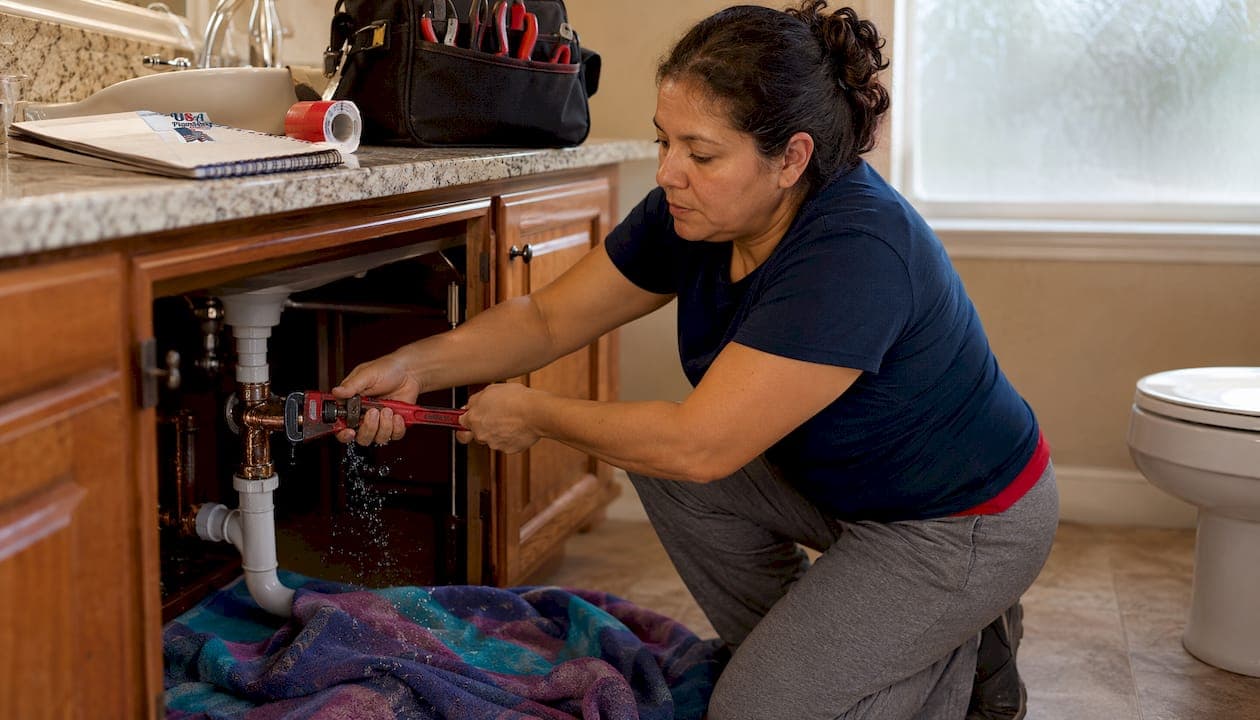
Shut off the water right now. That single action stops a burst pipe from becoming a flooded room. Find the nearest isolation valve on the supply line feeding the leak, or go straight to your main shutoff if you can't locate it. Everything else comes after that valve has closed.
Once the water is off, work through this checklist fast:
- Kill the electrical risk. If water is near outlets, appliances, or the breaker panel, turn off power to the affected area at the breaker only if you can reach it from a dry location.
- Contain the water. Place buckets and old towels under the leak immediately.
- Document the damage. Take 4–6 quick photos before you move anything. Those images will help with your insurance claim and contractor estimate.
- Call a licensed plumber. Get someone on the way while you apply a temporary patch.
Remember: Every repair method covered below is plumbing first aid, not a permanent fix. A licensed plumber must complete a proper repair.
Pro Tip: Know where your main shutoff valve is before an emergency happens. In most homes it's near the water meter, in the basement, or in a utility closet. Tape a label to it now.
Table of Contents
- How do you stop a burst pipe and protect your home safely?
- How do you drain the pipes and find the leak before patching?
- Which temporary repair method works for your pipe material and leak size?
- What should you never use on a leaking pipe?
- How do you test a temporary repair before turning the water back on?
- How long will a temporary pipe repair actually hold?
- When should you call a licensed plumber right now?
- What should your home emergency plumbing kit contain?
- Key Takeaways
- What a licensed plumber actually does when they arrive
- Usaplumbingseptic is ready when you need emergency help now
- Useful sources and further reading
- FAQ
How do you stop a burst pipe and protect your home safely?
Safety comes before any patch job. Water and electricity together can kill, and a flooded room can cause structural damage in hours.
Work through these steps in order:
- Stop the water. Close the nearest isolation valve, or the main shutoff if needed.
- Isolate electricity. If water has reached outlets or the panel, flip the breaker for that zone only if you can do so from a completely dry spot. If you can't, call emergency services or a licensed electrician first.
- Move valuables and electronics. Get rugs, furniture, and electronics out of the wet area immediately.
- Absorb standing water. Lay down towels, use a wet/dry vacuum, or place buckets under active drips.
- Ventilate. Open windows to reduce humidity and slow mold growth.
A half-inch residential pipe burst can pour over 50 gallons of water into your home in one hour, making every minute of delay costly.
Do not attempt a temporary repair if any of these apply:
- Water is in direct contact with electrical panels or live wiring
- The leak involves sewage (gray or black water, foul smell)
- You see visible structural damage like sagging ceilings or buckled floors
- The pipe has completely separated or blown out over a long section
In those situations, keep the water off, get everyone out of the affected area, and call a professional immediately.
How do you drain the pipes and find the leak before patching?
With the main valve closed, your pipes still hold 5–15 gallons of residual water. Releasing that pressure makes the temporary patch far more effective.
- Open the highest faucet in the house first. This lets air enter the top of the system so water can flow freely downward.
- Work your way down. Open faucets on each floor below, then the lowest faucet in the home.
- Flush toilets. Each flush pulls several more gallons out of the supply lines.
- Let it drain completely. Wait until the flow from open faucets slows to a drip.
- Dry the damaged area. Wipe the pipe surface with a clean cloth. Epoxy putty and silicone tape both need a dry surface to bond correctly.
- Confirm the leak location. Run your hand along the pipe to feel for moisture, or look for discoloration and mineral deposits that mark the failure point.
Pro Tip: Suspect a concealed leak behind drywall? Look for soft spots, bubbling paint, or a musty smell before cutting anything. A moisture meter (available at any hardware store for under $30) can pinpoint the wet zone without unnecessary drywall damage. For underground or hidden pipe issues, see our guide on underground water leak repair.
Which temporary repair method works for your pipe material and leak size?
The right fix depends on what your pipe is made of and how bad the damage is. Here's a practical breakdown of every method worth keeping in your emergency kit.
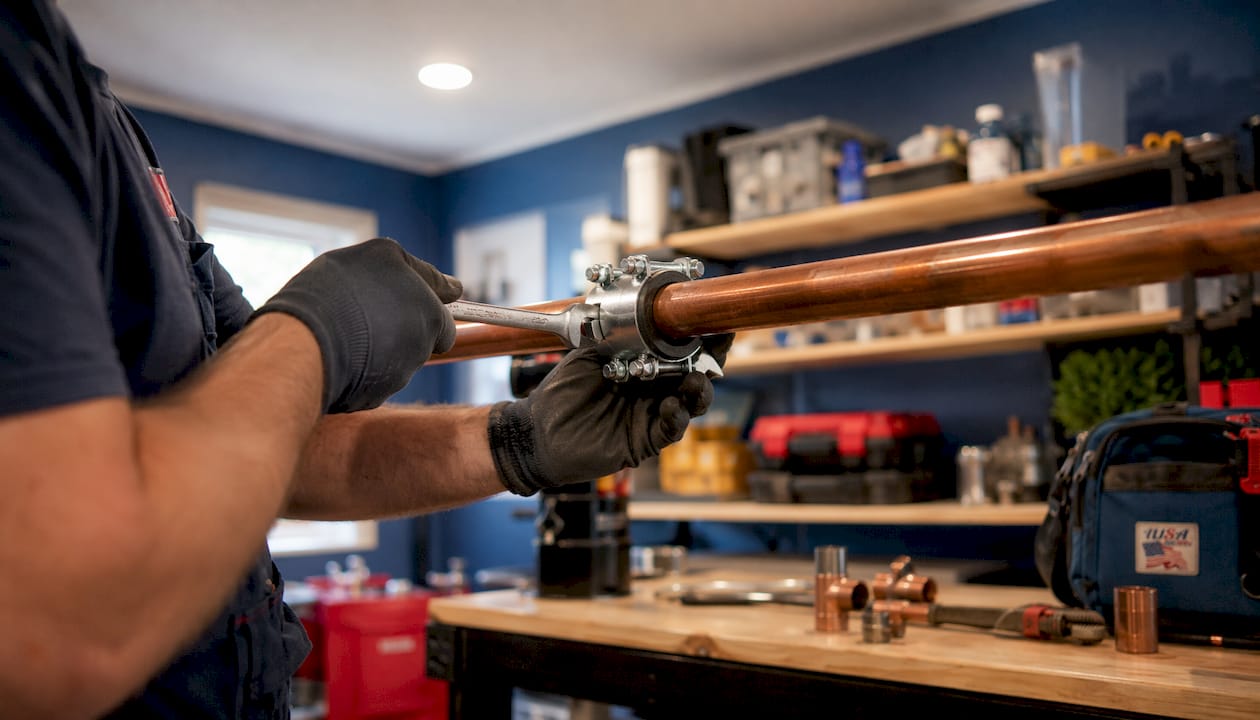
Self-fusing silicone tape
Best for: pinhole leaks and small cracks on copper, PEX, and PVC.
- Dry the pipe surface completely.
- Start wrapping 2 inches before the leak.
- Stretch the tape to roughly 50% of its original width as you wrap, overlapping each pass by about half.
- Continue 2 inches past the damaged area.
- Press the end firmly against the previous layer. No adhesive needed — it bonds to itself.
Silicone tape reaches a full bond in approximately 24 hours. It won't handle a blowout, but for a pinhole or hairline crack it's the fastest option in your kit.
Epoxy putty
Best for: pinholes and small cracks on copper and galvanized steel. Not recommended for PVC or PEX.
- Dry and lightly sand or score the pipe surface around the leak.
- Cut or break off the amount of putty you need.
- Knead the two parts together by hand until the color is uniform. The compound will warm up as the chemical reaction starts.
- Press the mixed putty firmly over the leak and shape it around the pipe.
- Hold it in place for 3–5 minutes. Most epoxy putty formulas set in 5–10 minutes and can hold significant pressure on a dry, prepped surface.
Pipe repair clamp (saddle clamp)
Best for: straight-run leaks on copper, galvanized, and PVC of any size up to a moderate crack.
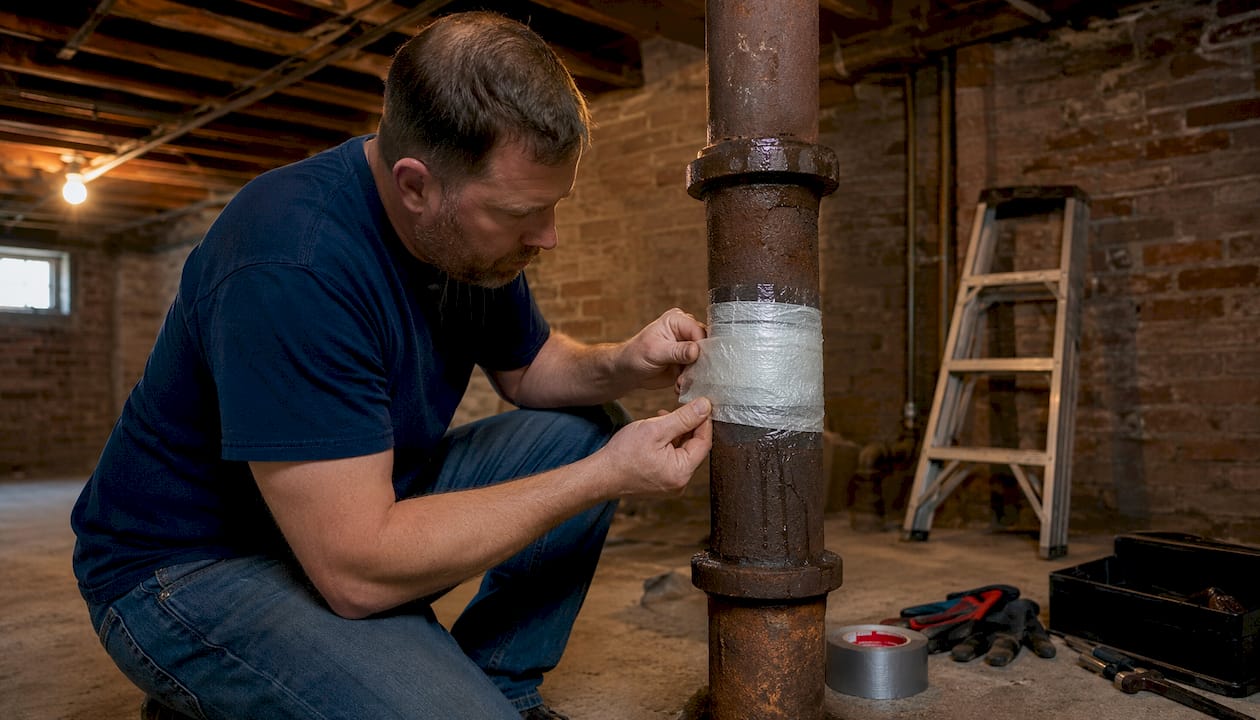
A repair clamp uses a metal sleeve with a rubber gasket and bolts. Center the gasket directly over the leak, then tighten the bolts evenly, alternating sides. Snug is enough — overtightening can crush copper or crack PVC. When sized correctly, a clamp often outlasts tape and putty by weeks or months.
Pipe repair wrap (fiberglass wrap tape)
Best for: straight runs on copper and galvanized where you need more rigidity than silicone tape provides.
Wet-activated fiberglass wrap hardens around the pipe as it cures. Wrap it tightly over and beyond the damaged area, overlapping each layer. It sets in 15–30 minutes and creates a rigid shell. It works best on smooth, straight sections — not on joints or elbows.
Rubber patch with hose clamps
Best for: moderate cracks on straight runs when you have no clamp kit available.
Cut a piece of rubber sheeting (an old inner tube works) large enough to cover the leak with an inch of overlap on each side. Press it firmly over the pipe and secure it with two hose clamps, one on each side of the patch. Tighten evenly. This is a true improvised fix and should be replaced by a proper clamp as soon as possible.
Slip (repair) coupling
Best for: a clean break on a straight run where you can make two square cuts and have the right coupling on hand.
A slip coupling is the most involved option and the closest to a permanent repair. Cut out the damaged section cleanly, slide the coupling over the pipe ends, and tighten the compression fittings. This method only works when you can make clean cuts and the coupling matches the pipe's sizing standard.
Pro Tip: Always match the repair product to the pipe's sizing standard. Copper and CPVC use CTS (Copper Tube Size); iron and galvanized use IPS (Iron Pipe Size). A clamp or coupling sized for the wrong standard will leak under pressure no matter how tight you make it.
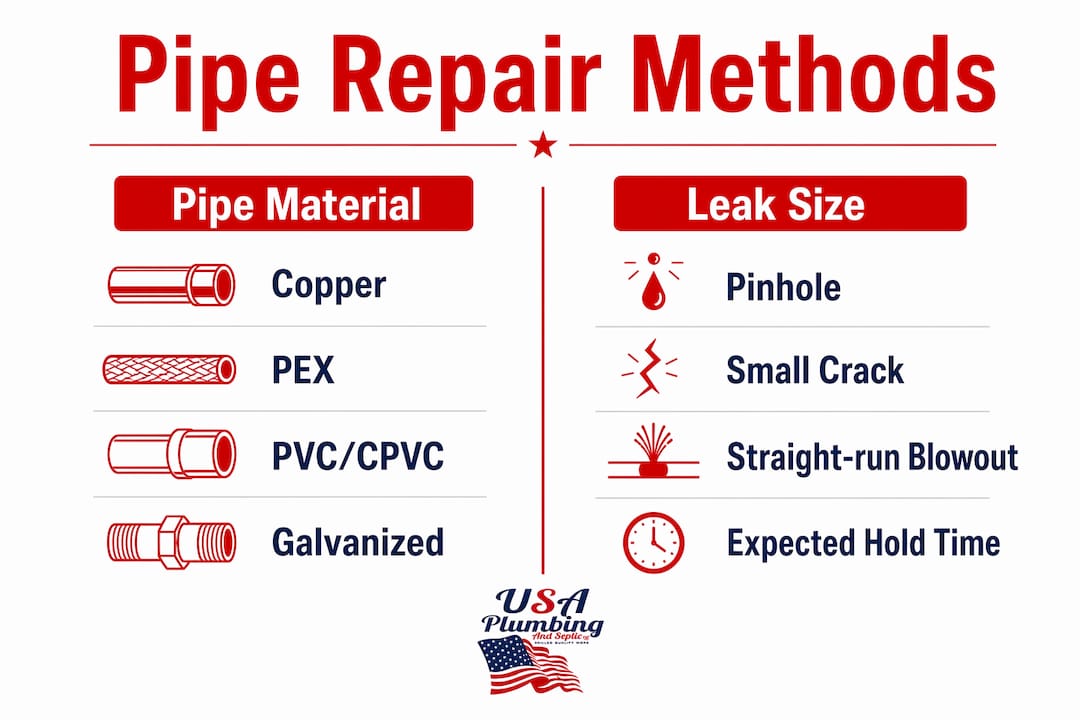
Method comparison by pipe material and leak size
| Method | Copper | PEX | PVC/CPVC | Galvanized | Pinhole | Small crack | Straight-run blowout | Expected hold time |
|---|---|---|---|---|---|---|---|---|
| Silicone tape | ✓ | ✓ | ✓ | ✓ | Best | Fair | No | Hours to days |
| Epoxy putty | ✓ | No | No | ✓ | Best | Fair | No | Hours to days |
| Repair clamp | ✓ | ✓ | ✓ | ✓ | ✓ | Best | Fair | Days to months |
| Fiberglass wrap | ✓ | No | ✓ | ✓ | Fair | ✓ | Fair | Days to weeks |
| Rubber patch + clamps | ✓ | ✓ | ✓ | ✓ | Fair | ✓ | Fair | Hours to days |
| Slip coupling | ✓ | ✓ | ✓ | No | ✓ | ✓ | Best | Weeks to months |
What should you never use on a leaking pipe?
Some common household fixes make things worse. Avoid these.
- Duct tape alone. It can slow a drip on a dry, low-pressure pipe for a short time, but it fails quickly under residential water pressure and leaves a sticky residue that interferes with proper repairs.
- Plumber's putty as a sealant. Plumber's putty is designed for drain fixtures and faucet bases, not pressurized supply lines. It won't hold under pressure.
- Tightening corroded galvanized fittings. Applying torque to old galvanized threads can fracture the metal instantly, turning a manageable drip into a full break. For corroded galvanized systems, use a non-invasive temporary seal and schedule replacement.
- Adhesive-only solutions on wet surfaces. Super glue, PVC cement, and similar adhesives need a completely dry, clean surface. On an active leak, they simply won't cure.
Safety rule: Never attempt any repair on a gas line yourself. Gas leaks require an immediate call to your gas utility and a licensed professional. Similarly, if the leaking water is gray or black (sewage), do not touch it without protective gloves and eyewear, and call a plumber right away.
Pro Tip: For leaks near concealed or underground pipes, resist the urge to dig or cut walls aggressively. You risk hitting other lines. Mark the area, keep the water off, and let a licensed plumber locate and access the pipe properly.
How do you test a temporary repair before turning the water back on?
Rushing the restore is how a second failure happens. Follow this sequence.
- Remove standing water and dry the area. Keep buckets and towels in place.
- Station a helper at the patch. They watch the repair while you operate the valve.
- Open the main or isolation valve no more than a quarter turn. Let pressure build slowly.
- Wait 2–3 minutes. Watch for any drip, seepage, or bulging around the patch.
- If it holds, open the valve halfway. Wait another 2–3 minutes.
- If still holding, open fully. Check the patch once more after 5 minutes at full pressure.
Watch for these failure signs during the test:
- A drip that grows into a steady stream
- New moisture appearing outside the patch edges
- Bulging drywall or ceiling material nearby
- Any hissing or gurgling from behind walls
If any of these appear, close the valve immediately, reapply or reinforce the patch, and repeat the test. Do not leave the water running unattended after a temporary repair.
How long will a temporary pipe repair actually hold?
Realistic expectations matter here. Temporary fixes are not rated for long-term residential pressure.
- Silicone tape and epoxy putty: Hours to a couple of days under normal pressure. Heat, vibration, and older pipe surfaces shorten that window.
- Repair clamps (properly sized): Days to several months, depending on clamp quality and pipe condition. A well-fitted clamp on a clean copper pipe can hold surprisingly well.
- Fiberglass wrap: Days to a few weeks on a straight run.
- Rubber patch with hose clamps: Hours to a day or two. This is a last-resort fix.
- Slip coupling (compression type): Weeks to months, but still not a permanent solution for most DIY installations.
Even after a successful temporary repair, keep the main water supply off when the house is unattended overnight or for extended periods. One pressure spike or temperature swing can fail a patch without warning.
When to insist on same-day service: If the pipe is near electrical systems, if the temporary fix failed once already, or if the leak is in a wall or ceiling where you can't monitor it, call for a same-day appointment. Don't wait until the next morning. The cost of minor water leaks compounds fast when they go unmonitored.
When should you call a licensed plumber right now?
Some situations are beyond what any temporary fix can safely handle. Call a professional immediately if you see any of these:
- Active large blowout with water you cannot stop at a local valve
- Water in contact with electrical panels, outlets, or wiring
- Sewage backup or gray/black water involved
- Visible structural damage: sagging ceilings, buckled floors, cracked walls
- A temporary fix that has already failed once
- Leaks at multiple locations simultaneously
When you call, give the dispatcher this information:
- Exact location of the leak (room, floor, wall or ceiling, under slab)
- Pipe material if you know it (copper, PEX, PVC, galvanized)
- Leak type (pinhole, joint leak, full blowout)
- Whether the water is currently off
- Any electrical exposure near the leak
Ask the plumber these questions when they arrive: What is the permanent repair, and how long will it take? Can they do it today, or is this a temporary hold? Do they handle water mitigation or board-up if drywall needs to be opened?
For a full list of situations that qualify as true emergencies, see our guide on emergency plumbing situations.
What should your home emergency plumbing kit contain?
Assembling this kit now costs far less than the water damage from a pipe failure you weren't ready for. Store it near your main shutoff valve.
Essential items:
- Adjustable pipe repair clamps in 1/2", 3/4", and 1" sizes
- Self-fusing silicone tape (one or two rolls)
- Epoxy putty stick (two-part, at least 4 oz)
- Rubber sheet patch (6" x 6" minimum) and two hose clamps
- Adjustable wrench and utility knife
- Two buckets and a stack of old towels
- Isolation valve key or shutoff wrench
- Waterproof flashlight or headlamp
Check the kit every few months: confirm the epoxy putty hasn't hardened in its packaging and the silicone tape roll is still sealed. For broader plumbing maintenance tips, a little prevention goes a long way.
| Item | Approximate cost | Where to buy |
|---|---|---|
| Pipe repair clamp set (3 sizes) | $10 | Hardware store, home center |
| Self-fusing silicone tape (2 rolls) | $15 | Hardware store, online |
| Epoxy putty stick (4 oz) | $6 | Hardware store, home center |
| Rubber patch + hose clamps | $5–$10 | Hardware store, auto parts store |
| Adjustable wrench | $10 | Hardware store |
| Shutoff valve key | $5–$10 | Hardware store, plumbing supply |
Key Takeaways
Shutting off the water immediately and applying the right temporary fix for your pipe material are the two actions that separate minor water damage from a costly disaster.
| Point | Details |
|---|---|
| Shut off water first | Close the nearest isolation valve or main shutoff before anything else. |
| Match the fix to the pipe | Use silicone tape for PEX/PVC pinholes; epoxy putty for copper/galvanized; a repair clamp for straight-run cracks on any material. |
| Temporary fixes have limits | Tape and putty hold hours to days; well-sized clamps can last days to months — all require a licensed permanent repair. |
| Test before walking away | Restore water slowly, watch the patch for several minutes, and never leave it unattended. |
| Usaplumbingseptic is available 24/7 | For homeowners in Bullhead City, Fort Mohave, Mohave Valley, and Laughlin, call Usaplumbingseptic for same-day emergency response. |
What a licensed plumber actually does when they arrive
Temporary fixes buy time. What happens after the plumber walks in is a different story, and understanding it helps you stay calm and make good decisions under pressure.
When our team at Usaplumbingseptic arrives at a burst pipe call, the first thing we do is assess the full system, not just the visible break. A single failure point is often a symptom of broader pipe age or pressure issues. We check the pipe material, the condition of nearby fittings, and whether the temporary patch held cleanly or masked a larger problem.
The permanent repair almost always involves cutting out the damaged section and installing a proper fitting: a sweat-soldered coupling on copper, a push-to-connect or crimp fitting on PEX, a solvent-welded coupling on PVC. We also pressure-test the repaired section before closing any walls. That test is what separates a real repair from another band-aid.
One thing homeowners often underestimate is how much root cause matters. Pipes don't usually burst without a reason. Freezing temperatures, water hammer, corrosion, and high static pressure are the most common culprits. Understanding why pipes burst helps you prevent the next one. A licensed plumber will identify the cause and recommend whether a section replacement or a full repiping makes more sense for your home's age and condition.
Usaplumbingseptic is ready when you need emergency help now
A burst pipe at 2 AM in Bullhead City doesn't wait for business hours, and neither do we.

Usaplumbingseptic provides 24/7 emergency plumbing response across Bullhead City, Fort Mohave, Mohave Valley, and Laughlin. Our licensed technicians arrive ready to diagnose, repair, and pressure-test, so you're not left with another temporary patch. When you call, have the pipe location, material, and water shutoff status ready. That information gets our team to the right fix faster.
For local homeowners who want to be prepared before an emergency hits, our Mohave County plumbing guide covers the essentials. When you're ready for a professional to take over, book your emergency service call and get a licensed plumber on the way today.
Useful sources and further reading
The following resources informed this guide and are worth bookmarking for product instructions and code-level guidance:
- Pipe Leak Repair: How to Fix Leaking Plumbing — Lowe's: Practical overview of repair clamps, epoxy, and silicone tape with product guidance.
- How to Fix a Leaky Pipe: Emergency Stops and Permanent Repairs — FixUpFirst: Detailed how-to steps including silicone tape application and epoxy putty prep.
- Burst Pipe: 60-Second Emergency Steps — HelpByExperts: Fast-action checklist and residual water draining sequence.
- How to Emergency Repair a Leaky Pipe — Oatey: Product-level guidance on epoxy putty, repair clamps, couplings, and silicone tape.
- DIY Pipe Leak Repair Guide — Balkan Plumbing: Cautions on corroded galvanized fittings and when not to apply torque.
- What to Do If You Have a Bathroom Leak — JM Plumbing Services: Practical emergency steps for localized leaks.
- EPA WaterSense: Fix a Leak Week: EPA guidance on household leak detection and water conservation.
Always follow the specific product instructions on the repair product you use, and consult a licensed plumber for any repair inside a wall, ceiling, or under a slab.
FAQ
How do I temporarily stop a burst pipe at home?
Close the nearest isolation valve or your main water shutoff immediately, then apply a repair clamp, self-fusing silicone tape, or epoxy putty over the damaged area once the pipe is dry. These are temporary measures — a licensed plumber must complete a permanent repair.
Can plumber's putty temporarily fix a leak?
No. Plumber's putty is formulated for drain fixtures and faucet bases, not pressurized supply lines. Use two-part epoxy putty instead, which sets in 5–10 minutes and bonds to copper and galvanized steel under pressure.
Can duct tape temporarily stop a pipe leak?
Duct tape can slow a drip on a dry, low-pressure pipe for a very short time, but it fails quickly under normal residential water pressure. Self-fusing silicone tape is a far more reliable option and is available at any hardware store.
What is the best quick fix for a burst pipe?
A properly sized pipe repair clamp is the most reliable quick fix for a straight-run burst because it creates a mechanical seal with a rubber gasket that holds longer than tape or putty. For pinholes, self-fusing silicone tape applied with 50% overlap and stretch is the fastest option.
When should I call a plumber instead of patching the pipe myself?
Call a plumber immediately if water is near electrical panels, if the pipe has completely separated, if sewage is involved, or if a temporary fix has already failed once. All temporary repairs must eventually be followed by a permanent licensed repair regardless of how well the patch holds.
This article provides general information for homeowners and is not a substitute for professional plumbing advice. Confirm current local codes and repair requirements with a licensed plumber for your specific situation.