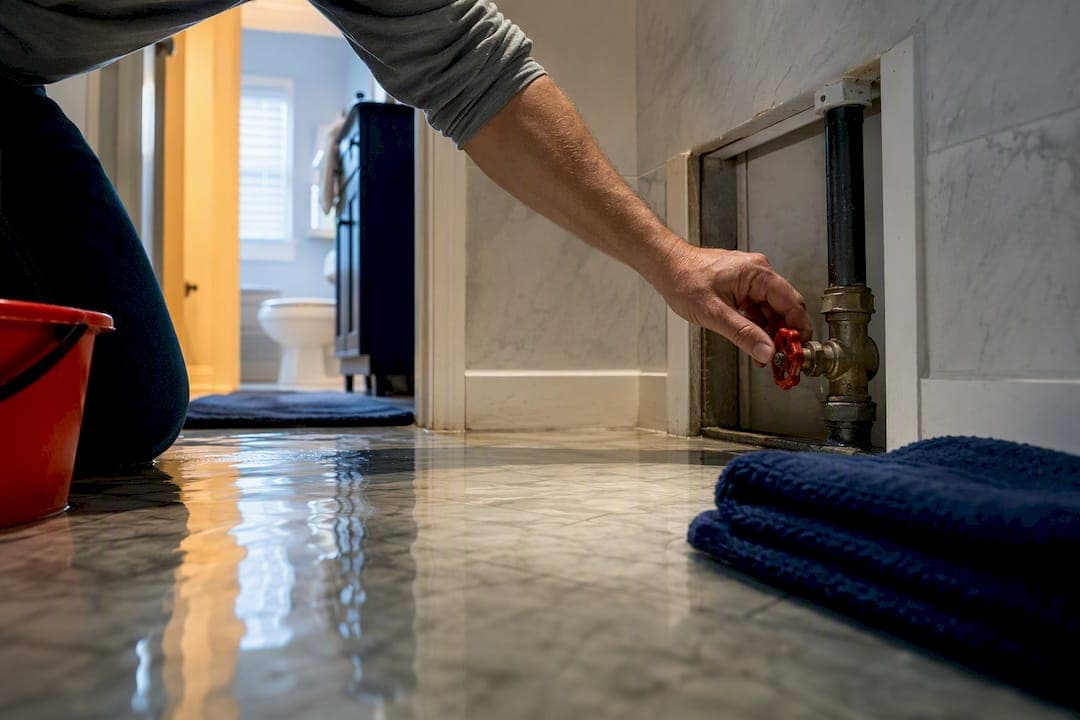
Shut off the water now. That is the single most important action to stop further damage. Find the fixture's isolation valve or your home's main shutoff and close it immediately. If water is touching electrical outlets or you smell sewage, stay out of the room, cut power at the breaker panel only if you can reach it safely, and call a professional.
TL;DR:
- Shutting off the main water supply and the bathroom circuit breaker is critical before attempting cleanup or inspection, especially to avoid electrical hazards.
- Removal of contaminated or sewage water should be handled only by professionals using PPE, as health risks increase significantly with gray or black water.
- Proper drying requires pairing air movers with dehumidifiers to prevent hidden moisture, mold growth, and structural damage behind walls or under flooring.
- Document damage thoroughly with photos and videos before any cleanup or repairs, as insurance claims depend heavily on detailed initial evidence.
- Actively maintain fixtures and install leak sensors to prevent common failure points and reduce the risk of future flooding incidents.
Table of Contents
- What Should You Do First When Your Bathroom Floods?
- How Do You Clean and Dry a Flooded Bathroom?
- Documenting the Damage for Your Insurance Claim
- When Should You Call a Plumber or Restoration Contractor?
- Simple Upgrades That Prevent the Next Flood
- Who Wrote This Guide
- How Do You File an Insurance Claim for a Flooded Bathroom?
- What Do You Do With Water-Damaged Bathroom Items?
- An Editorial Take on Priorities When Your Bathroom Floods
- Get Emergency Help From USA Plumbing and Septic LLC
- Sources
- FAQ
What Should You Do First When Your Bathroom Floods?
The first 60 minutes after a flooded bathroom determine whether you're dealing with a mopping job or a five-figure repair. Every homeowner who has faced a burst supply line or an overflowing toilet knows the panic that sets in. That panic is exactly why a checklist beats instinct.
Run through these steps in order, not all at once:
- Stop the source. Close the fixture isolation valve under the toilet or sink first. If you can't find it or the water is coming from somewhere unclear, shut off your home's main water valve.
- Check for electrical hazards. If outlets, light switches, or fixtures are wet or near standing water, turn off the bathroom circuit at the breaker box, but only if you can do it from dry ground. Never step into standing water to reach a panel.
- Get people and pets clear of the room. Kids and pets track contaminated water through the house faster than you'd think.
- Pull out what you can save quickly. Rugs, towels, baskets, and anything electronic near the flood zone should come out first.
- Document before you touch anything else. Photograph the source, the standing water, and any damaged items from multiple angles, including close-ups of model or serial numbers on water heaters or supply lines.
- Start removing shallow, clean water. Towels work for minor spills. A wet/dry vacuum clears more ground faster.
A few things belong on a mental warning list rather than a numbered step:
- Stop DIY extraction the moment water looks gray, brown, or smells like sewage.
- Stop if the water is deeper than about an inch and still spreading.
- Stop if the floor feels soft, springy, or the ceiling below shows a stain.
If you've handled active leaks before, the 24 hour plumbing emergency checklist walks through the same shutoff logic for other rooms in the house, and it's worth bookmarking before you need it.
Pro Tip: Keep a photo of your main shutoff valve's location saved on your phone. In a real flood, you won't want to be searching the garage for it.
How Do You Clean and Dry a Flooded Bathroom?
Cleanup strategy depends entirely on what kind of water you're dealing with. Restoration professionals sort flood water into three categories, and the category dictates how much you should handle yourself.
Category 1 is clean water from a supply line or overflow tank. You can mop, vacuum, and dry this yourself. Category 2 is "gray water," meaning water that's picked up contaminants, often from a washing machine or dishwasher backup. Category 3 is sewage or water that's contacted waste lines, and it carries real health risk. If your flood falls into Category 3, treat cleanup as a job for gloves, a respirator, and ideally a licensed technician, not a mop.
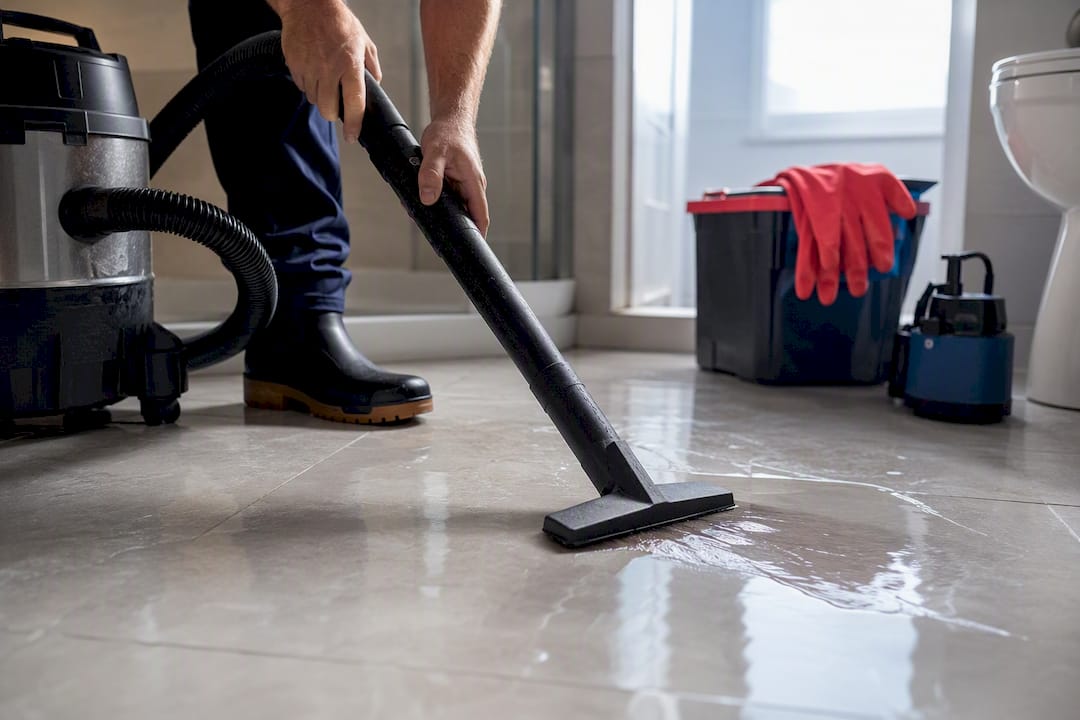
For standing water removal, a wet/dry vacuum handles small pools efficiently. Deeper water or flooded lower-level rooms may need a small sump pump. Wear rubber boots and gloves regardless of category, since you often can't tell how contaminated water is just by looking at it.
When disinfecting is necessary, public health guidance recommends a bleach solution made by diluting bleach in water according to label instructions, typically about one cup per gallon. Never mix bleach with ammonia or ammonia-based cleaners. The combination produces toxic fumes, and it's a mistake made often enough that it's worth repeating even to careful homeowners.
Drying is where most people fall short. Fans alone push air around a room but don't actually pull moisture out of materials, which is why restoration professionals recommend pairing air movers with a dehumidifier to dry behind baseboards and inside wall cavities to prevent hidden moisture and mold.
- Persistent musty odor days after the flood
- Baseboards that look warped or feel soft
- Flooring that stays spongy underfoot
Any of those signs point to hidden moisture, and that's a job for professional drying equipment, not another box fan.
Pro Tip: A moisture meter costs less than a nice dinner out and tells you in seconds whether a wall cavity is actually dry, instead of guessing.
Documenting the Damage for Your Insurance Claim
Before you clean, grab your phone. Comprehensive photos and video taken before cleanup give adjusters what they need to verify the scope of damage, and skipping this step is the single most common reason claims drag out for weeks.
Capture these specifically:
- Wide shots of the room showing water extent
- Close-ups of the source (supply line, wax ring, toilet base)
- Serial numbers on water heaters, faucets, or appliances involved
- Damaged personal items before you move or discard them
- Receipts for any emergency purchases, like a wet/dry vacuum or fans
Call your insurer as soon as you've stopped the water and documented the scene. They'll want the date and time of the flood, the suspected cause, and whether the water is still active. Do not throw away damaged flooring, cabinetry, or drywall, and don't start demolition, until an adjuster has seen it or given explicit permission, unless mold or sewage contamination makes immediate removal a health necessity.
One coverage note worth knowing upfront: sudden, accidental plumbing failures, like a burst supply line, are typically covered under a standard homeowners policy. Water damage from an outside flood or a slow leak that went unnoticed for weeks is often excluded. That distinction is exactly why the timeline you document matters as much as the photos themselves.
When Should You Call a Plumber or Restoration Contractor?
Some situations are DIY. Others aren't, and pretending otherwise usually costs more later. Call a professional immediately if you notice:
- Any contact with sewage or waste line backup
- Water that's reached the subfloor, wall cavities, or insulation
- Flooring that feels soft, spongy, or visibly sagging
- Wet electrical outlets, switches, or exposed wiring
- A musty smell that lingers more than a day or two
- Repeated flooding from the same fixture
A plumber's job is stopping the leak and repairing the failed part, whether that's a supply line, a wax ring, or a cracked drain fitting. A water restoration contractor handles extraction, structural drying, and antimicrobial treatment. Ask for a plumber's license number and confirm that any restoration technician carries IICRC certification for water damage work, since that credential specifically covers drying protocols and category classification.
Pro Tip: A soft or spongy floor almost always means the subfloor has absorbed water, and that's a tear-out job, not a mop-and-fan fix. Acting within that 24 to 72 hour window is what separates a repair bill from a renovation.
Simple Upgrades That Prevent the Next Flood
Most bathroom floods trace back to a handful of predictable failure points, and most are preventable with basic maintenance.
- Replace flexible supply lines regularly, as aging hoses are a leading cause of sudden failures. source
- Inspect the toilet's wax ring and base connection yearly for rocking or seepage.
- Test your main shutoff valve twice a year so it isn't frozen shut when you need it.
- Consider a leak sensor or automatic shutoff device near the toilet and under the vanity.
- Clear hair traps and drain guards regularly to prevent slow backups that strain seals over time.
If your bathroom has flooded more than once, or if you've dealt with hidden moisture after a past incident, it's worth scheduling a professional plumbing inspection rather than waiting for a third event. Choosing water-resistant materials during any bathroom repair, including moisture-tolerant door options, also reduces how much a future leak can damage.
Who Wrote This Guide
This guide comes from John, who writes emergency plumbing and repair guides grounded in real field practices. Usaplumbingseptic backs it with 24/7 emergency plumbing service and trained technicians who handle exactly this kind of call. For a companion resource, the temporary pipe repair steps guide covers slowing an active leak before help arrives.
How Do You File an Insurance Claim for a Flooded Bathroom?
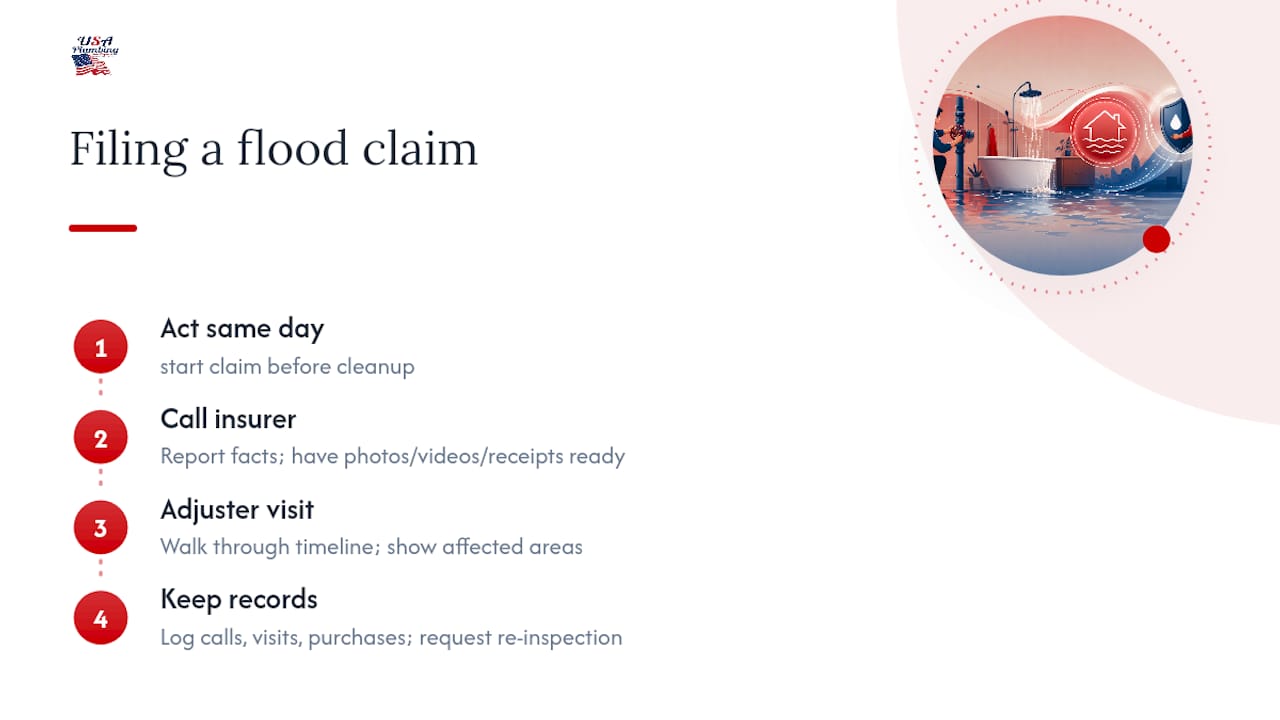
Start the claim process the same day the flood happens, not after cleanup. Acting quickly on both mitigation and insurer notification tends to produce better claim outcomes, largely because early documentation matches the damage more closely than photos taken days later.
Call your insurance company's claims line and report the incident with the date, cause, and current status of the water. They'll typically assign a claim number and schedule an adjuster visit, often within a few business days for active leaks. Have your photos, videos, and any receipts for emergency supplies ready before that call.
During the adjuster's visit, walk them through the timeline: when you noticed the flood, what you shut off, and what steps you took to limit damage. Point out affected areas you may not have photographed yet, including anything behind cabinetry or under flooring that's since been opened up.
Keep a written log of every call, every technician visit, and every purchase related to the flood. Insurers often ask for supporting documentation weeks after the initial claim, and a simple log saves you from digging through old texts and receipts under pressure. If the adjuster's estimate seems to miss damage you've documented, you can request a re-inspection, but that request carries more weight when your photo and video record is thorough from day one.
What Do You Do With Water-Damaged Bathroom Items?
Not everything touched by flood water is a loss, but the sorting rules differ by material and by how contaminated the water was.
Porcelain fixtures like toilets and sinks generally survive Category 1 and Category 2 water without issue after a thorough cleaning and disinfection. If sewage was involved, a plumber should inspect seals and connections before you trust the fixture again, since bacteria can linger in gaskets and hidden joints.
Cabinetry is trickier. Particleboard or MDF vanities that have absorbed standing water for more than an hour or two usually need replacement, since they swell and lose structural integrity in ways that don't reverse. Solid wood cabinetry has a better chance if it's dried quickly and thoroughly.
Towels, bath mats, and washable fabrics can typically be laundered in hot water with detergent, unless they were exposed to sewage, in which case discarding them is the safer call. Electronics, including any wired bathroom heaters or outlets, should be inspected by an electrician before use, even if they appear to have dried out fine.
Personal items with sentimental or financial value, jewelry boxes, photos, documents, deserve extra care: photograph them in their damaged state for your insurance file before attempting to dry or clean them, since some may not be salvageable and the record matters for your claim.
An Editorial Take on Priorities When Your Bathroom Floods
The instinct to grab a mop first is understandable, but it's backwards. Documentation and shutoff come before cleanup, every time, because photos taken after you've dried the floor tell an adjuster a lot less than photos taken while water is still standing. Move fast, but move in the right order, and call a professional the moment sewage, subfloor damage, or exposed wiring enters the picture.
— JOHN
Get Emergency Help From USA Plumbing and Septic LLC
Emergency plumbing services are available when a burst supply line or a failed wax ring causes bathroom flooding, including outside typical business hours. That's the real difference between a DIY guide and having someone show up: a technician arrives, diagnoses the failure, applies temporary mitigation to stop the damage from spreading, and gives you a written estimate before any repair work starts.

Once you've shut off the water, documented the damage, and notified your insurer, contacting a licensed plumber to inspect and repair the fixture is important. Learn more about what a technician visit covers on the plumbing essentials page for Mohave County, or reach out directly through the main service page to schedule a visit today.
Sources
- Baseboard water damage: causes, repair, and prevention
- Flood and sewer overflow cleanup (Illinois Department of Public Health)
- Document damage (FEMA / FloodSmart)
FAQ
How Do You Unflood a Bathroom?
Shut off the water source first, then remove standing water with towels or a wet/dry vacuum, and dry the area with a dehumidifier and air movers. If the water is contaminated or has reached the subfloor, call a licensed plumber or restoration contractor instead of continuing DIY cleanup.
How Long Does It Take to Dry Out a Flooded Bathroom?
Visible surfaces can dry within a day or two with proper fans and a dehumidifier, but hidden moisture inside walls or under flooring can take much longer and often needs professional drying equipment. Mold can begin forming within 24 to 72 hours, so speed matters more than waiting for a "complete" dry.
Does Homeowners Insurance Cover Toilet Flooding?
Sudden, accidental plumbing failures like a burst supply line or a failed wax ring are commonly covered under standard homeowners policies. Damage from a slow leak that went unnoticed for weeks, or flooding from an outside source, is often excluded, so report the incident promptly and document the timeline clearly.
What Are the Common Causes of Bathroom Flooding?
The most frequent causes are toilet overflows, burst or aging flexible supply lines, and failed wax rings at the toilet base. Checking these common overflow causes and replacing supply lines every 5 to 7 years prevents most of these failures before they happen.