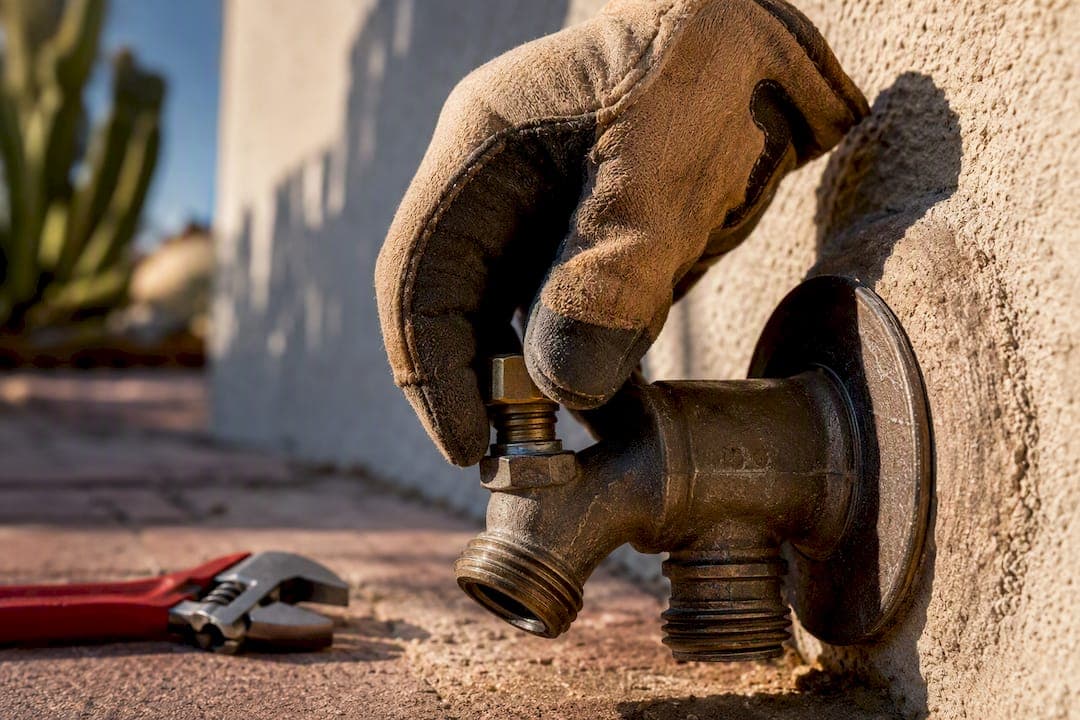
Shut the interior shutoff valve (or the main if your home has no separate one), then open the bib to drain the line before you touch anything. Once the line is dry, check whether the drip comes from the spout, the handle, or the wall behind the faucet. Most leaks trace back to a loose packing nut or a worn stem washer, and both are quick fixes with basic tools. If water shows up at the wall or the drip continues after a correct repair, that is your signal to call a plumber.
TL;DR:
- Tightening the packing nut about a quarter turn clockwise can often stop handle leaks if done carefully and within the nut's size range.
- Replacing the stem washer and packing involves disassembling the faucet, which can be completed in about 30 minutes using basic tools and matching new parts to the old.
- If water appears inside the wall or crawlspace, or if the faucet body is cracked or severely damaged, full replacement by a professional is necessary.
- Inspecting the vacuum breaker cap and rubber washer on hose connections is a quick fix that costs under $10, preventing the need for extensive repairs.
- Always shut off interior or main water valves before starting repairs, and test the fixture thoroughly after reassembling to ensure the leak is fully resolved.
Table of Contents
- Why Is My Hose Bib Leaking? How to Find the Source
- Safety Steps and What to Gather Before You Start
- How to Tighten the Packing Nut for a Handle Leak
- Replacing the Stem Washer and Packing for a Full Repair
- Fixing Vacuum Breaker and Hose Connection Leaks
- When to Replace the Whole Hose Bib
- How to Test Your Repair and Know It Actually Worked
- What Pros Notice That Most DIY Guides Skip
- An Editorial Take on Fixing a Leaking Hose Bib
- When to Call USA Plumbing and Septic LLC for a Hose Bib Repair
- Where to Find More Repair Details and Parts Guides
- Sources
- FAQ
Why Is My Hose Bib Leaking? How to Find the Source
Where the water shows up tells you almost everything you need to know before you pick up a wrench. Outdoor faucet leaks generally come from one of three spots, and the location determines whether you're looking at a five-minute fix or a job for a professional. Checking where the water actually appears, rather than guessing, sorts most cases correctly on the first try, since the leak point and whether the handle is open or closed together explain the majority of outdoor faucet problems homeowners run into.
Run through these checks before you shut anything off:
- Drip from the spout with the handle fully closed: almost always a worn rubber seat washer at the tip of the valve stem.
- Water seeping around the handle when the bib is running: a loose or worn packing nut, sometimes with dried-out packing string underneath.
- Spitting or dribbling from a small hole below the hose threads after you disconnect the hose: a failed vacuum breaker, not the main valve at all.
- Moisture, staining, or dripping showing up on the wall or foundation behind the bib: a cracked supply line or freeze damage, and this calls for a plumber rather than a parts swap.
A simple test helps confirm what you're seeing. Disconnect the hose, close the nozzle end of anything still attached, and run water through the bib while pressing a dry paper towel around each joint. Wet paper at the packing nut points to handle packing; wet paper only at the very tip points to the seat washer. If the towel stays dry everywhere but you still see water inside near the wall, stop testing and treat it as a plumbing issue, not a hardware-store fix.
Safety Steps and What to Gather Before You Start
Never take a hose bib apart while the line is still pressurized. Locate the interior shutoff valve, usually in the basement, crawlspace, or utility room, and close it before removing anything. If your home doesn't have a dedicated shutoff for that line, close the main water valve instead.
- Close the interior shutoff or main valve.
- Open the outdoor bib fully to drain residual water from the line.
- Lay towels and a small bucket under the work area to catch drips.
- Gather your parts and tools before disassembling anything.
Tools and parts checklist: an adjustable wrench, a flathead and Phillips screwdriver, a basic hose bib repair kit (washer and packing), plumber's grease, and PTFE tape.
Pro Tip: Take a photo of the stem assembly with your phone before you pull it apart. When you're standing in a plumbing aisle an hour later trying to remember which washer shape you need, that photo saves the trip.
Protect the siding around the bib while you work, and never force a stuck nut with excessive torque. A cracked faucet body from over-tightening turns a $10 repair into a full replacement.
How to Tighten the Packing Nut for a Handle Leak
If water seeps around the handle while the faucet runs, try this before you disassemble anything. The packing nut sits directly behind the handle, and a quarter-turn clockwise is often enough to compress the packing and stop the seep.
- Turn the water on and watch the handle area for the leak.
- Using an adjustable wrench, turn the packing nut a quarter turn clockwise.
- Test the handle's operation. It should still turn smoothly, not bind.
- Repeat in quarter-turn increments, checking for leaks each time.
- Stop as soon as the drip disappears. Do not keep cranking "for good measure."
Most residential hose bibs use a packing nut sized between 7/16 and 9/16 inch, so a standard adjustable wrench or a small set of open-end wrenches covers nearly every model you'll encounter. If you've gone a full turn or more without any change, the packing itself is likely worn out or the string packing has dried and cracked. At that point, tightening won't help anymore, and it's time to replace the packing directly.
Replacing the Stem Washer and Packing for a Full Repair
When tightening doesn't solve it, or when the drip is coming from the spout itself, replacing the internal parts is the next move. This is more involved than a quarter-turn fix, but it's still well within reach for most homeowners with basic tools and about 30 minutes.
- Confirm the interior shutoff is closed and the bib is fully drained.
- Remove the small screw holding the handle in place, then pull the handle off.
- Loosen and remove the packing nut with an adjustable wrench.
- Pull the stem assembly straight out of the faucet body.
- Locate the retaining screw at the tip of the stem and remove it to expose the old washer.
- Replace the worn rubber seat washer with a new one that matches the shape, flat or beveled, of the original.
- Remove any old packing string or O-ring from the stem and install fresh packing.
- Coat the new O-ring or packing lightly with plumber's grease before reassembly.
- Reinsert the stem, hand-tighten the packing nut, then snug it with a wrench.
- Reattach the handle and its retaining screw.
Pro Tip: Bring the old washer with you to the hardware store rather than trying to describe it. Washer shape and thickness vary enough between brands that "close enough" often isn't.
Before you button everything up, check the valve seat inside the faucet body where the washer presses down. Run a fingertip around the rim. If it feels rough, grooved, or pitted rather than smooth, a new washer will still leak because it's sealing against damaged metal. Seat resurfacing tools exist, but for most homeowners, a pitted seat is the point where replacing the whole bib becomes the more practical choice rather than chasing a leak with washer after washer.
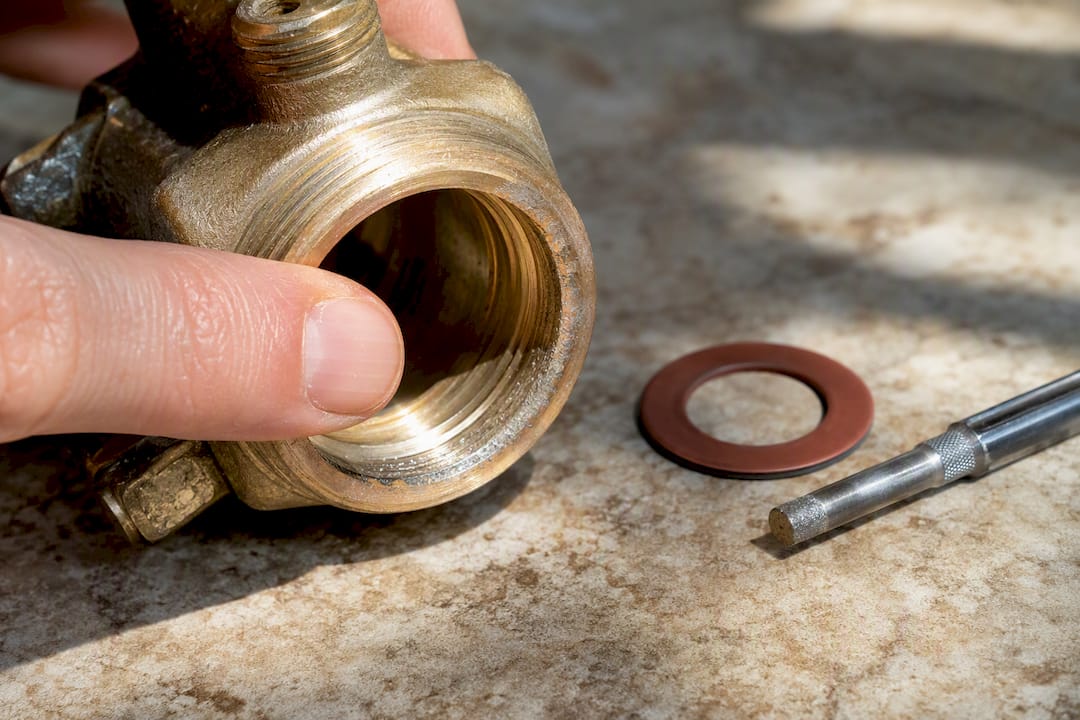
Once reassembled, turn the interior shutoff back on slowly and check for leaks at the packing nut and around the handle before moving on to a full test.
Fixing Vacuum Breaker and Hose Connection Leaks
Not every drip is a valve problem. A vacuum breaker, the anti-siphon device on top of most modern hose bibs, commonly causes spitting or dribbling from its small vent holes after you disconnect a hose. Homeowners often mistake this for a failing main valve and start disassembling the stem when the real problem is a $5 part on top.
- If water dribbles from the vent holes on top of the spout, suspect the vacuum breaker before anything else.
- Unscrew the vacuum breaker cap by hand or with gentle wrench pressure. Excessive force can crack the housing.
- Replace the cap or the internal cartridge, both sold as inexpensive stock parts.
- Check the rubber washer inside the hose coupling itself. A flattened or missing hose washer causes leaking at the connection point, not inside the bib at all.
- Inspect the hose threads and the nozzle for cross-threading or damage before blaming the faucet.
Vacuum breaker caps typically run $5 to $8, and a full basic repair kit with washers and packing usually costs under $10. Both jobs take fifteen minutes or less once you know that's the source.
When to Replace the Whole Hose Bib
Some leaks aren't worth chasing with parts, and winterizing your doors properly can help prevent related freeze damage. A cracked faucet body, a pitted valve seat that keeps leaking after a fresh washer, or water showing up inside the wall or crawlspace all point toward full replacement instead of another repair attempt.
- Cracked or split body: No washer or packing fixes a physically damaged faucet housing.
- Drip continues after correct washer and seat work: The seat is likely too pitted to seal properly.
- Water appears inside the wall or crawlspace: This usually means freeze damage or a cracked supply pipe behind the fixture, not the bib itself.
- Stripped threads on the mounting nipple: The bib won't seat tightly no matter how much tape you use.
For a straightforward swap, shut off the water, disconnect the old bib, and wrap the mounting threads with PTFE tape before threading in the replacement. Orient the new bib with a slight downward pitch so it drains fully after each use, which matters most in freeze-prone climates. If you're installing a frost-free model, measure the wall thickness first. The stem length has to reach the point where the shutoff valve sits inside the wall, or the "frost-free" design won't actually protect the line. Replacement jobs involving soldered connections, damaged stub-outs, or anything behind a finished wall belong to a plumber, not a Saturday afternoon project.
How to Test Your Repair and Know It Actually Worked
Turn the interior shutoff back on slowly rather than all at once. Leave the bib open while the line refills so trapped air can escape instead of hammering the pipe. Once water runs steady, close the bib and check for drips at the packing nut, spout, and vacuum breaker, running a dry paper towel around each joint the same way you did during diagnosis.
- Refill the line slowly with the bib open, then close it and watch every joint for a full minute.
- Attach a hose with the nozzle closed and run the faucet fully open to load the new washer under real pressure.
- Wipe every connection dry, then check again after a few hours.
Pro Tip: Don't declare victory after five dry minutes. Fresh packing sometimes weeps only after it's been under sustained pressure for a while, so check again the next morning before you put the tools away.
If the drip is gone the next day, you're done. If water is still finding its way out, or if you see moisture at the wall, that's no longer a parts problem.
What Pros Notice That Most DIY Guides Skip
The mistakes that turn a simple repair into a repeat call are almost always the same ones. Disassembling a stem while the line is still pressurized soaks the wall and wastes the parts you just bought. Overtightening the packing nut past the point of resistance cracks the nut or seizes the handle. Grabbing a washer that's "close enough" in size instead of matching it exactly guarantees another leak within weeks.
A few habits separate a repair that lasts from one that comes back:
- Keep the old washer and packing until the new ones are installed and tested, so you have a reference if something doesn't fit.
- Coat every O-ring and washer with plumber's grease before reassembly. It seats better and lasts longer.
- Feel the valve seat with a fingertip before installing a new washer. Pros check the seat first because a smooth new washer against a pitted seat is a wasted repair.
- Never force a stuck packing nut. If it won't budge with steady pressure, apply penetrating oil and wait rather than risk cracking the housing.
Experienced plumbing services have handled outdoor faucet repairs and full sillcock replacements across the Bullhead City area, knowing which shortcuts can cause repeat visits. The parts are cheap. The mistakes usually aren't.
An Editorial Take on Fixing a Leaking Hose Bib
Most online guides treat every hose bib leak like it needs a full teardown, and that's where they lose homeowners. The honest priority order is cheap fix first, always: tighten the packing nut before you touch anything else, because it solves a real share of handle leaks with zero disassembly and zero risk of losing a part down the drain. Skipping straight to a full stem replacement when a quarter-turn would have worked is the most common overcorrection I see in DIY advice.
Where conventional wisdom falls short is the seat. Plenty of guides walk through washer replacement and stop there, as if a new washer always seals. It doesn't, not against a pitted seat. That's the detail that separates a five-minute fix from a repair that fails again in a month, and it's worth the thirty seconds it takes to run a finger across the seat before you reassemble anything.
If you take one thing from this, let it be sequencing: tighten, then replace the washer and packing, then check the seat, then replace the whole unit. Skipping steps costs more than following them in order.
— JOHN
When to Call USA Plumbing and Septic LLC for a Hose Bib Repair
Some leaks are outside the scope of a Saturday project, and that's fine. If water is showing up inside a wall or crawlspace, if your home has no accessible interior shutoff, or if the replacement involves soldered fittings or freeze-damaged pipe behind a finished surface, that's a professional visit, not a parts run.

Professional plumbing services handle calls throughout Bullhead City, Fort Mohave, Mohave Valley, and Laughlin, and unlike a hardware-store return counter, a licensed visit catches hidden problems like a cracked stub-out, a failing shutoff valve, or freeze damage behind the wall before it turns into a bigger repair. Teams handle emergency faucet repairs, full sillcock replacement, and diagnostics to determine whether a leak involves a simple parts replacement or a larger plumbing issue. A visit typically includes a full pressure and leak check around the fixture, not just a washer swap. If you've worked through the DIY steps above and the drip won't quit, or if you'd rather skip straight to a professional fix, book a service visit with our Golden Valley plumbing team and get it handled right the first time.
Where to Find More Repair Details and Parts Guides
A few outside resources fill in details this guide only touches on, especially for model-specific parts and troubleshooting tables.
- Fixupfirst's hose bib repair walkthrough covers packing nut and washer replacement with photos of common part shapes.
- The Saving Water Partnership's outdoor faucet page breaks down the tightening sequence in more detail.
- Angi's vacuum breaker guide explains anti-siphon device symptoms specific to different bib designs.
Always check your specific faucet manufacturer's instructions before ordering parts. Stem lengths and washer shapes vary enough between brands that a universal repair kit doesn't fit every model.
Sources
- How to Fix a Leaking Hose Bib: Packing Nut, Washer, and Replacement
- How to Fix a Leaking Outdoor Faucet / Hose Bib (2026) — Step-by-Step Guide
- Outdoor faucet leaks | Saving Water Partnership
FAQ
How Much Does It Cost to Fix a Leaking Hose Bib?
Basic repair kits with washers and packing typically cost under $10, and vacuum breaker caps run $5 to $8. A full replacement sillcock costs modestly more, and a professional visit adds labor on top of parts if you'd rather not tackle it yourself.
Do You Need a Plumber to Replace an Outdoor Spigot?
Not always. A straightforward swap with accessible fittings is manageable for most DIYers, but replacements involving soldered connections, freeze damage, or fittings behind a finished wall are best left to a licensed plumber.
Why Does My Spigot Drip Even When I Turn It Off?
A drip with the handle fully closed almost always means the rubber seat washer at the tip of the valve stem is worn out. If a new washer doesn't stop it, the valve seat underneath is likely pitted and needs replacement.
How Do You Replace the Gasket in a Hose Bib?
Shut off the water, drain the bib, remove the handle and packing nut, then pull the stem out to access the washer and packing. Replace the worn rubber washer at the stem tip and any packing string or O-ring around the stem, grease the new parts, and reassemble in reverse order.