
Pipes "sweat" because warm, humid air contacts a pipe surface that sits at or below the air's dew point, causing water vapor to condense into liquid on the outside of the pipe. The technical term is pipe condensation, and the moisture comes entirely from the surrounding air, not from inside the pipe. Stop it by raising the pipe surface temperature, lowering room humidity, or both.
Quick actions you can take right now:
- Dry the pipe with a towel and run a box fan to increase airflow around it.
- Set up a portable dehumidifier in the room, especially in basements or crawl spaces.
- Wrap the pipe temporarily with foam pipe insulation from any hardware store.
- Run bathroom and kitchen exhaust fans longer after showers and cooking.
- Open interior doors to improve air circulation and reduce localized humidity.
The most durable fix is wrapping exposed cold-water pipes with closed-cell foam insulation and keeping indoor relative humidity low. Those two steps together eliminate sweating in most homes.
Table of Contents
- Why do pipes sweat? The science in plain terms
- Is sweating on pipes normal, or should you be concerned?
- How to tell sweating from an actual leak
- Why you shouldn't ignore pipe condensation
- Where in your home are pipes most likely to sweat?
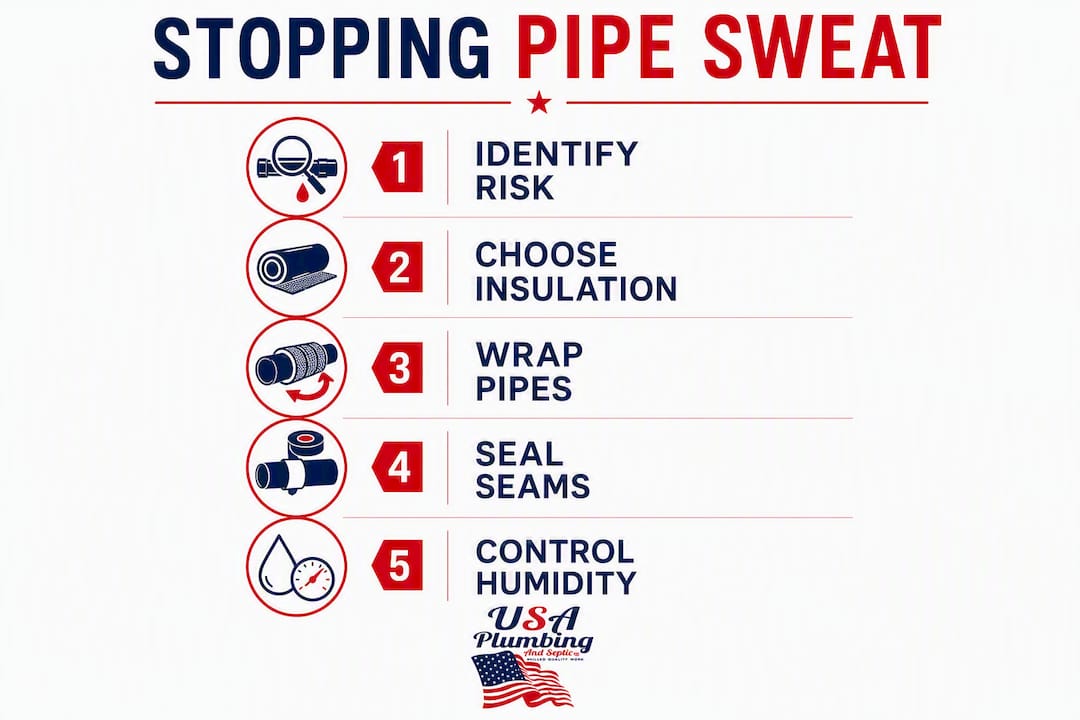
- How to stop and prevent pipe sweating
- Best insulation options for cold-water pipes
- Step-by-step DIY: insulating a straight cold-water pipe
- Typical costs and how long fixes take
- When to call a licensed plumber
- Key Takeaways
- What most homeowners get wrong about pipe sweating
- Persistent pipe sweating? Usaplumbingseptic is ready to help
- FAQ
Why do pipes sweat? The science in plain terms
Condensation is the physical change of water vapor into liquid when it contacts a surface cooler than the surrounding air. The dew point is the air temperature at which that change becomes inevitable. When a cold-water pipe runs at a temperature well below the basement air, which is warm and humid, the dew point may be higher than the pipe surface temperature, causing condensation. The pipe surface is well below that threshold, so moisture drops out of the air and clings to the pipe.
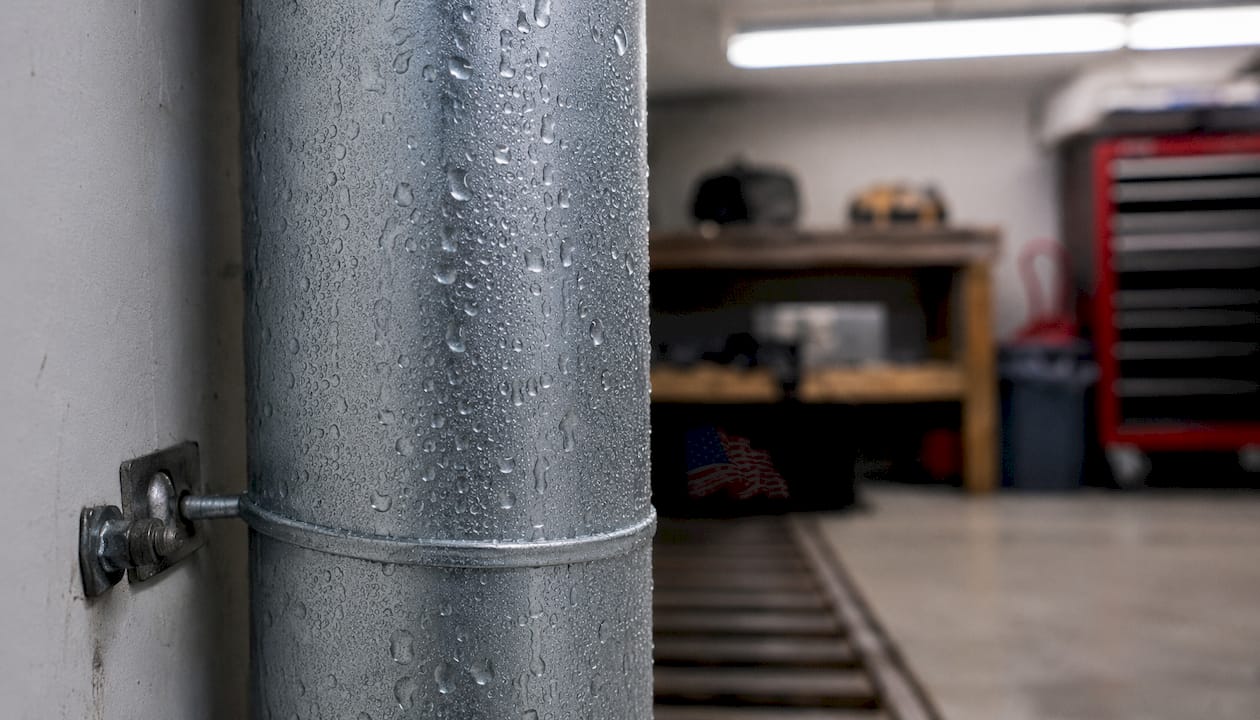
Three variables drive the process: room temperature, relative humidity, and pipe surface temperature. Pipe surface temperature almost always matches the water temperature inside. So a cold-water line in summer is essentially a refrigerated surface sitting in warm, humid air. Raise the room's dew point threshold by lowering humidity, or raise the pipe surface temperature with insulation, and condensation stops.
Pipe material matters too, though it is a secondary factor. Copper and steel conduct cold readily, pulling the surface temperature down fast and producing condensation quickly. PEX and PVC have better natural thermal resistance, so they slow the rate of condensation in marginal conditions. They do not change the dew point, but they buy time. Homes with copper cold-water lines in humid basements are common candidates for visible sweating. For more on how temperature swings affect your pipes year-round, see why pipes burst in heat.
Is sweating on pipes normal, or should you be concerned?
Seasonal sweating on cold-water lines is common and expected. In most U.S. homes, it peaks in summer when outdoor humidity is high and disappears in winter when heating dries the indoor air. If your basement pipes drip in July and are bone-dry by November, that pattern is classic condensation and not a structural problem on its own.
A few quick rules of thumb:
- Sweating only on cold-water lines, only during humid months: normal condensation.
- Sweating that stops overnight when temperatures drop: normal condensation.
- Wet pipes in winter, or wet pipes regardless of season: worth investigating.
- Any wet pipe carrying hot water: treat it as a leak until proven otherwise.
Condensation-control insulation is not universally required by code, but it is widely accepted as best practice. Seasonal sweating becomes a problem when it is heavy enough to drip onto floors, saturate drywall, or create standing moisture on surfaces. At that point, the nuisance becomes a property risk.
How to tell sweating from an actual leak
Homeowners frequently confuse sweating with leaks, which leads to unnecessary repair calls or, worse, ignored real leaks. The diagnostic is straightforward once you know what to look for.
- Look at the moisture pattern. Condensation produces a uniform film of moisture along the entire pipe run. A leak produces a concentrated wet spot at one point, often with dripping directly below it.
- Do the dry-paper test. Dry the pipe completely with a towel. Press a dry paper towel or tissue against the pipe and hold it for 30 seconds. If the paper gets uniformly damp across a wide area, that is condensation. If it soaks through at one small spot, that is a leak.
- Check the timing. Does the moisture appear mainly after showers, on hot humid days, or when the AC is running hard? Condensation follows humidity. A leak is present regardless of weather or season.
- Test the hot-water lines. Condensation does not form on hot-water pipes. If a hot-water line is wet, you have a leak.
- Look for staining. Rust-colored streaks, white mineral deposits, or green oxidation around a wet spot are signs of a persistent leak, not condensation. Condensation leaves no staining.
- Check underground or concealed runs. If you find unexpected moisture near a wall or floor with no visible pipe above it, review our guide to underground water leak repair before assuming it is surface condensation.
Pro Tip: Photograph the wet area before drying it. Note the date, outdoor temperature, and whether the AC or heat was running. That information helps a plumber diagnose the problem in minutes rather than hours.
Why you shouldn't ignore pipe condensation
Persistent condensation is not just an annoyance. Left unaddressed, it leads to rust, valve corrosion, material degradation, and mold growth, making early action far less expensive than later remediation.
Property risks:
- Corrosion on copper and steel pipes, shortening their service life.
- Valve and fitting deterioration, leading to drips and failures at joints.
- Drywall saturation, causing soft spots, bubbling paint, and eventual structural weakness.
- Wood rot on floor joists and subfloor in basements and crawl spaces.
- Degradation of existing pipe insulation or surrounding building insulation.
Health risks:
- Mold and mildew growth on wet surfaces, releasing spores into indoor air.
- Elevated indoor humidity feeding dust mites and other allergens.
- Musty odors that indicate active biological growth in enclosed spaces.
A typical 30–50 pint dehumidifier for humid basements costs roughly $180–$400 (2026 prices), while an anti-sweat mixing valve for a toilet tank is commonly $75–$150 installed. Both are far cheaper than mold remediation or replacing a rotted subfloor.
Where in your home are pipes most likely to sweat?
Some spots in a typical home are reliably higher risk than others.
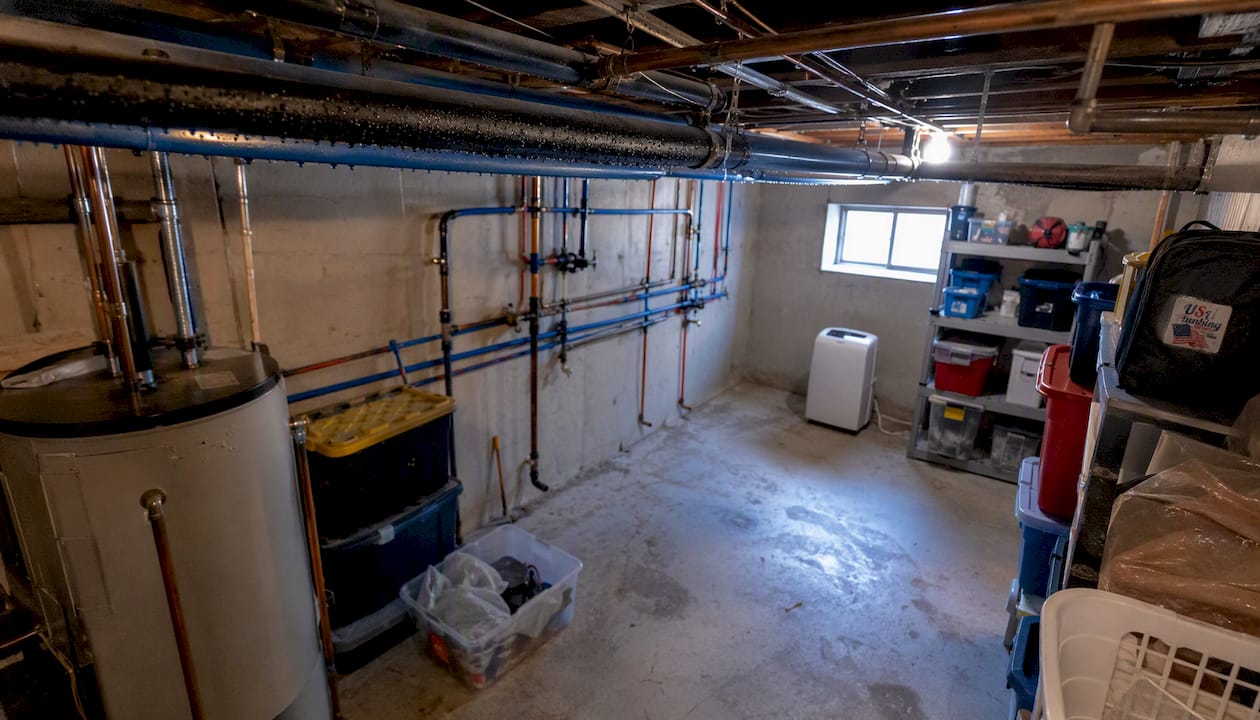
Basements and crawl spaces top the list. Poor ventilation, earth-contact humidity, and long uninsulated cold-water runs create ideal condensation conditions. Copper supply lines running along basement ceilings are the most common complaint.
Under-sink runs on exterior walls are exposed to both cold wall temperatures and kitchen or bathroom humidity. The combination is especially bad in older homes with uninsulated exterior walls.
Laundry rooms generate significant humidity from dryers venting improperly or from washing machine exhaust. Cold-water supply lines nearby sweat heavily during wash cycles.
Toilet tanks are a classic case. The tank holds cold water continuously, and bathroom humidity after showers causes visible dripping down the outside of the tank and onto the floor.
HVAC refrigerant and A/C lines sweat when the refrigerant line insulation deteriorates. This is a specialized fix, usually requiring an HVAC technician rather than a plumber.
Pro Tip: Before inspecting enclosed spaces like crawl spaces or utility closets, cover nearby electrical outlets with tape and avoid touching electrical fixtures with wet hands. Moisture and electricity near pipe runs are a real hazard.
How to stop and prevent pipe sweating
Fix the root cause first, then protect the pipe. Here is the priority order:
-
Lower room humidity. A dehumidifier set to maintain relative humidity at or below 50% lowers the dew point enough that many cold-water pipes stop sweating entirely. This is the most effective single fix because it changes the air's dew point rather than just masking the symptom. Pair it with exhaust fans in bathrooms and kitchens.
-
Increase airflow. Stagnant air near a cold pipe saturates faster. A small box fan aimed at exposed pipe runs in a basement breaks up that stagnant layer and slows condensation. Moving stored items away from pipe runs helps too.
-
Insulate the pipe with a vapor-barrier product. Closed-cell foam rubber sleeves (such as Armaflex or equivalent EPDM products) create a thermal break and act as a vapor barrier, keeping warm humid air from ever reaching the cold pipe surface. Open-cell or fiberglass insulation without a jacket can trap moisture against the pipe and accelerate corrosion, so material choice matters.
-
Address toilet tanks and refrigeration lines separately. Toilet tanks benefit from an anti-sweat mixing valve, which introduces a small amount of hot water into the tank to raise its surface temperature. Refrigerant line insulation should be inspected and replaced by an HVAC technician when it shows cracking or gaps.
Safety note: you do not need to shut off the water supply to insulate an exposed cold-water pipe, but work carefully around shutoff valves and avoid covering valve handles with insulation that would prevent access.
Best insulation options for cold-water pipes
| Insulation Type | Effectiveness | DIY Ease | Cost per Linear Foot | Vapor Barrier | Durability | Best For |
|---|---|---|---|---|---|---|
| Closed-cell rubber foam (EPDM/Armaflex) | Excellent | Moderate | Moderate cost | Yes | Durable | Exposed basement runs, humid areas |
| Polyethylene foam (pre-slit sleeve) | Good | Very easy | Low cost | Partial | Moderate durability | Short runs, dry areas, budget fixes |
| Fiberglass with foil jacket | Good | Moderate | Moderate cost | Yes (foil) | Durable | Longer runs, attic or mechanical rooms |
| PEX/PVC pipe (intrinsic) | Fair | N/A | N/A | No | Typical lifespan | New installs, marginal humidity only |
Closed-cell rubber foam is the preferred choice for exposed lines in humid basements because it acts as a true vapor barrier, preventing warm air from migrating through the insulation to the cold pipe surface. Open-cell products and fiberglass without a sealed jacket allow vapor to pass through and can trap moisture against the metal, which speeds up corrosion rather than preventing it.
Polyethylene foam sleeves from a hardware store are fine for a quick fix on a short run in a moderately humid space. For a full basement with copper supply lines, invest in closed-cell rubber.
Pro Tip: For concealed in-wall runs, use fiberglass with a foil vapor-barrier jacket and seal all seams with foil tape. For exposed basement runs, closed-cell rubber foam with self-sealing or taped joints is the right call. Never leave joints open — an unsealed gap is where condensation re-enters.
Step-by-step DIY: insulating a straight cold-water pipe
What you need:
- Closed-cell rubber foam pipe sleeve (sized to your pipe diameter)
- Insulation tape or self-sealing foam tape
- Utility knife
- Measuring tape
- Work gloves
Steps:
- Measure the pipe run from end to end, including any elbows or tees you plan to cover.
- Cut the foam sleeve to length with a utility knife. Pre-slit sleeves open along one side; for closed sleeves, cut a straight line along the length.
- Dry the pipe completely before fitting the insulation. Any trapped moisture accelerates corrosion.
- Fit the sleeve over the pipe, pressing the slit edges together firmly. For pre-glued sleeves, peel the backing and press closed. For unglued sleeves, apply insulation tape along the full seam.
- At joints, elbows, and tees, cut the sleeve to fit snugly and tape all seams. Gaps at fittings are the most common failure point.
- Secure long runs with pipe hangers or zip ties every 3–4 feet to prevent sagging.
- After 24 hours, check for any new moisture on the outside of the insulation. Moisture on the insulation surface means a seam is open or the product is not a true vapor barrier.
Time estimate: A 20-foot straight basement run takes most homeowners 45–90 minutes. Difficulty level is low. No water shutoff is needed for cold-water pipe insulation on an exposed run.
If sweating persists after insulation: Check that all seams are sealed, confirm the product is closed-cell, and measure room humidity. If relative humidity is above 60%, the insulation alone may not be enough. Add a dehumidifier.
Typical costs and how long fixes take
| Fix | DIY Material Cost | DIY Time | Pro Installation Cost | Pro Time |
|---|---|---|---|---|
| Closed-cell foam insulation (20 ft run) | Affordable | 1–2 hours | Moderate professional cost | 1–2 hours |
| Polyethylene foam sleeve (20 ft run) | Low cost | 30–60 min | Lower professional cost | 1 hour |
| Dehumidifier for basements (30–50 pint) | $180–$400 | Quick setup | N/A | N/A |
| Anti-sweat mixing valve (toilet tank) | $75–$150 installed | 1–2 hours | $75–$150 installed | 1 hour |
| Full basement pipe insulation (pro) | N/A | N/A | Moderate to high professional cost | Half to full day |
DIY insulation is the most cost-effective path for straightforward exposed runs. A dehumidifier is a one-time purchase that protects the whole space. Professional installation makes sense for long runs, hard-to-reach pipes, or when the homeowner is not comfortable working around valves and fittings.
When to call a licensed plumber
Some situations go beyond what insulation and a dehumidifier can fix. Call a licensed plumber when you see any of these:
- Wet hot-water pipes. Condensation does not form on hot lines. Moisture there is a leak.
- Concentrated dripping at a single point, especially with rust or mineral staining around it.
- Moisture that persists through winter or regardless of outdoor humidity levels.
- Visible mold on walls, floors, or pipe surfaces near the wet area.
- Structural softness in flooring or drywall adjacent to a sweating pipe run.
- Puddles or standing water near a pipe, especially in a utility room or crawl space.
- Condensation that continues after you have insulated and controlled humidity.
When you call, have this information ready: photos of the wet area, the pipe material (copper, PEX, galvanized), whether the pipe carries hot or cold water, your current indoor humidity reading if you have a hygrometer, and how long the problem has been present. That detail cuts diagnostic time significantly. For situations involving possible leaks alongside condensation, our leak detection guide walks through what a professional inspection covers.
If you see water contacting electrical fixtures, smell burning near a wet area, or find a large puddle with no obvious source, treat it as an emergency and call immediately.
Key Takeaways
Pipe condensation stops when the pipe surface stays above the air's dew point, which you achieve by insulating with closed-cell foam, running a dehumidifier, or doing both together.
| Point | Details |
|---|---|
| Root cause is dew point | Condensation forms when pipe surface temperature falls at or below the air's dew point. |
| Diagnose before you fix | A uniform moisture film means condensation; a concentrated wet spot with staining means a leak. |
| Closed-cell foam is the best insulation | It acts as a vapor barrier and prevents warm air from reaching the cold pipe surface. |
| Dehumidifier addresses the root cause | Keeping indoor humidity at or below 50% lowers the dew point and stops sweating across the whole space. |
| Usaplumbingseptic handles what DIY can't | Call for wet hot-water pipes, persistent moisture after insulation, visible mold, or structural damage. |
What most homeowners get wrong about pipe sweating
The conventional advice is to wrap the pipe and move on. That works for mild cases, but it misses the bigger picture. Insulation is a barrier, not a cure. If the room's relative humidity stays at 70% or higher, even good closed-cell foam will eventually fail at seams, joints, and fittings. The moisture finds its way in.
The fix that actually lasts targets the dew point of the room, not just the pipe surface. A dehumidifier running at 50% relative humidity changes the physics of the whole space. Every pipe in that basement benefits, not just the one you wrapped. Homeowners who insulate without addressing humidity often call a plumber a year later wondering why the sweating came back.
There is also a common mistake with insulation choice. Polyethylene foam from a hardware store is cheap and easy, and it works fine in a dry utility room. Put it in a humid basement and it absorbs moisture through open seams, holds it against the pipe, and accelerates the corrosion it was supposed to prevent. Closed-cell rubber foam costs more per foot, but it is the right product for the right job.
The other thing worth saying plainly: if you are not sure whether it is condensation or a leak, do not guess. The dry-paper test takes two minutes. A missed leak costs far more than a service call.
Persistent pipe sweating? Usaplumbingseptic is ready to help
When insulation and a dehumidifier are not enough, or when you are not sure whether you are dealing with condensation or a real leak, Usaplumbingseptic gives Bullhead City and surrounding communities a direct line to experienced, licensed plumbers who diagnose the problem correctly the first time.

We handle diagnostic visits, anti-sweat valve installation, pipe insulation on hard-to-reach runs, and leak detection for situations where the moisture source is not obvious. If you have found mold, structural damage, or a wet hot-water line, we treat those as priority calls. Our team serves Bullhead City, Fort Mohave, Mohave Valley, Laughlin, and neighboring communities, and we are available 24/7 for urgent situations.
Check out our plumbing essentials resource for Mohave County to understand what local homeowners deal with most, or contact us directly to schedule a visit. Have your photos and humidity readings ready, and we will take it from there.
Selected sources and further reading
- InspectApedia: Condensation on Plumbing Pipes and Water Tanks — detailed explanation of condensation mechanics and diagnostic patterns.
- Bonded Plumbworks: Condensation on Pipes — covers the most effective remediation strategies and insulation product guidance.
FAQ
How do I stop my pipes from sweating?
Wrap exposed cold-water pipes with closed-cell rubber foam insulation and run a dehumidifier to keep indoor relative humidity at or below 50%. Those two steps together stop sweating in most homes.
How can I tell if a pipe is leaking or sweating?
Dry the pipe and press a paper towel against it. A uniform damp film across the whole run points to condensation; a concentrated wet spot that soaks through at one point, especially with rust or mineral staining, indicates a leak.
Is it normal for copper pipes to sweat?
Yes, copper conducts cold readily, making it more prone to condensation than PEX or PVC in humid conditions. Seasonal sweating on copper cold-water lines during summer is common and expected in most U.S. homes.
Is condensation on pipes bad for my home?
Persistent condensation causes corrosion, valve deterioration, mold growth, and structural damage to drywall and wood over time. Seasonal sweating that dries on its own is a nuisance; heavy or year-round dripping needs to be addressed.
When should I call a plumber instead of fixing it myself?
Call a licensed plumber when a hot-water pipe is wet, when moisture persists through winter or after you have already insulated, when you see rust staining or mold, or when there is structural damage near the wet area. Usaplumbingseptic is available 24/7 for urgent situations in Bullhead City and surrounding communities.