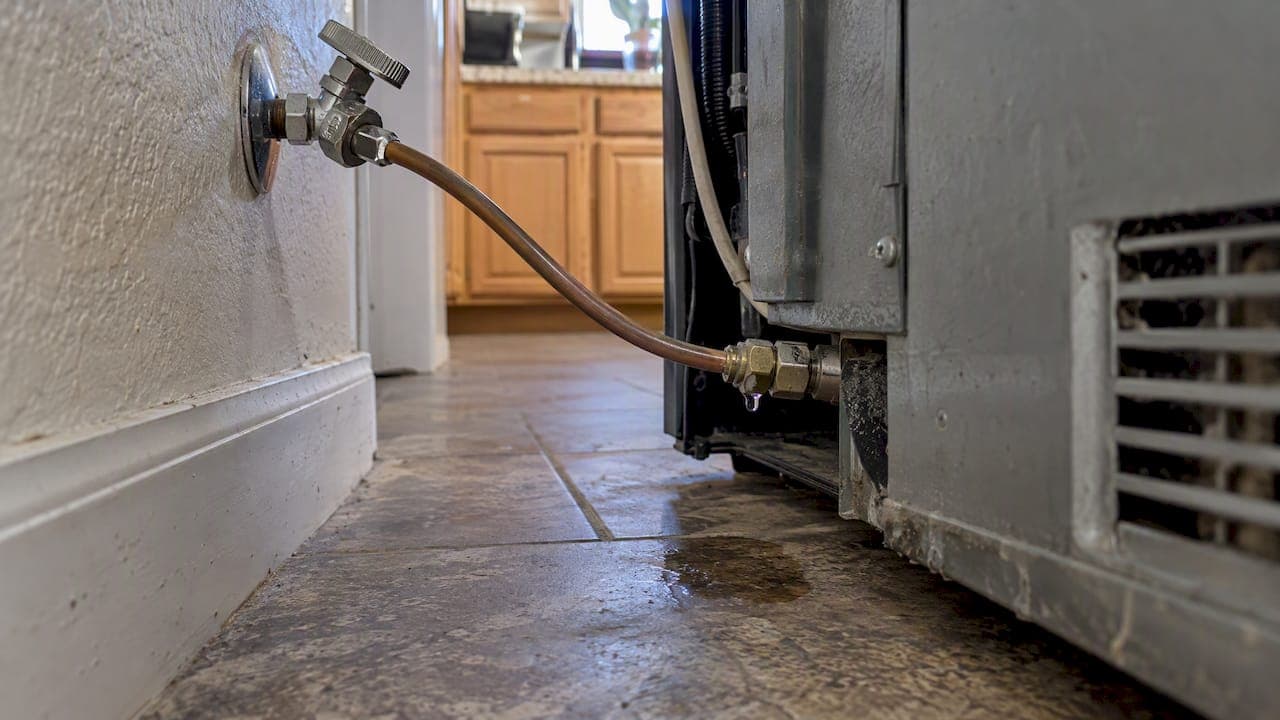
A loose supply connection, a cracked line, a frozen fill tube or a faulty inlet valve usually causes an icemaker water line leak. Shut off the water to the fridge, unplug it, and set out towels. If the leak stops with the water off, the supply line is the culprit. If it keeps going, the problem is inside the appliance, and that is when you call a plumber.
TL;DR:
- LG lists typical icemaker pressure as 21 to 121 PSI; pressure below about 21 PSI can cause slow filling and frozen fill tubes.
- Photograph water locations before thawing or moving parts, then briefly restore the supply and inspect visible fittings; cardboard beneath the fridge reveals tiny drips.
- A frozen fill tube usually reflects slow dripping from low or fluctuating pressure or valve debris; safe defrosting can take 4 to 6 hours.
- Replace quarter inch tubing with soft copper or PEX, leave a service loop, and call a plumber for persistent leaks, valve faults, or uncertain connections.
- Consumer Reports finds icemaker and dispenser repairs typically cost in the low to mid hundreds of dollars, while serious failures cost much more.
Table of Contents
- Where an icemaker water line leak usually starts
- Quick triage: three checks to stop the leak and gather evidence
- Diagnosing frozen fill tubes and inlet-valve problems
- Repair and replacement: safe DIY steps and what a plumber does
- Preventing future leaks: a maintenance checklist
- How to detect small or hidden leaks with common tools
- Replacing the water inlet valve or fill tube
- Common causes: installation errors and tubing wear
- Signs of water damage beyond the icemaker area
- Disposing of replaced parts the right way
- Author perspective: why the plumber's call can save you thousands
- How we help with icemaker water line leaks
- FAQ
- Sources
Where an icemaker water line leak usually starts
Water rarely comes from a mystery source. It almost always starts at one of a handful of spots, and each one leaves its own clues.
- Supply connections: The shutoff valve, saddle valve and compression fittings often drip right at the nut. Look for a wet ring or mineral crust on the fitting.
- Tubing: Clear plastic or braided lines can develop pinholes or cracks. Discoloration or a steady drip under the fridge points here.
- Frozen fill tube: A slow drip freezes inside the tube, ice builds up, and water gets deflected into the bin or down the freezer wall.
- Cracked ice mold or overfilling: Water collects in the ice bin or inside the freezer, not under the cabinet.
- Low or swinging pressure: Many manufacturers expect a minimum pressure for proper filling. Weak or fluctuating pressure causes slow drips that freeze.
Pressure matters: LG's spec sheet puts typical icemaker water pressure at about 21 to 121 PSI, and notes that pressure below roughly 21 PSI causes slow filling and related problems.
Once you know which of these matches what you see, the next steps get much easier.
Quick triage: three checks to stop the leak and gather evidence
Before you pull anything apart, do these in order. They limit damage and tell you whether the supply side is to blame.
- Turn off the water feeding the refrigerator, either at the shutoff under the sink or at the house shutoff, and unplug the fridge. Water and electricity do not mix, and appliance guidance stresses unplugging before any repair. If you can't find the house shutoff fast, our guide to finding and closing your main water shut off walks you through it.
- Lay down towels or a bucket, then photograph every spot where water shows up: under the fridge, inside the freezer, around the ice bin. Those photos help whoever diagnoses the problem.
- Turn the water back on briefly and watch the visible connections. If the leak returns only when the water is on, the supply line or a fitting is the cause.
Pro Tip: Slide a sheet of cardboard under the fridge before you test. It shows even a tiny drip and keeps your floor dry.
Diagnosing frozen fill tubes and inlet-valve problems
A frozen fill tube forms when slow drips freeze inside the tube. Whirlpool's service pointer on frozen fill tubes lists low or high water pressure and debris in the valve as common causes. Debris can stop the valve from closing fully, so water keeps trickling in.
Here is how we work through it:
- Document first: Photograph the ice buildup before you thaw it, if you can.
- Defrost safely: Disable the ice maker or unplug the fridge and leave the freezer door open. iFixit's troubleshooting guide puts the melt time at 4–6 hours.
- Test the valve: Shut off the water, disconnect the outlet tube and route it into a bucket. Turn the water on briefly and compare flow. A weak flow or slow drip points to valve debris or low pressure.
- Check the pressure: If you suspect weak supply, measure it against the manufacturer's range.
Don't panic over the ice: Homeowners often mistake a frozen fill tube for a burst pipe. iFixit notes that ice buildup usually means a slow drip or fill-tube issue, not a broken water line in the wall.
If the valve still drips after cleaning, it needs replacing. That is covered a few sections down.
Repair and replacement: safe DIY steps and what a plumber does
Some fixes are well within a handy homeowner's reach. Others are not.
Safe DIY steps:
- Shut off the water and unplug the fridge.
- Pull the fridge out and tighten any leaking compression nut with a wrench. Home-repair guidance says that if tightening fails, shut the water off and consider replacing the line.
- Replace damaged 1/4" tubing. Maytag's product help recommends 1/4" soft copper or PEX, with a service loop so the fridge can be pulled out.
- Swap a clogged water filter and check for kinks that cut flow.
When to call us: persistent leaks after tightening, a bad inlet valve or solenoid, an unclear source, signs of cabinet or floor damage, or any time you aren't confident reconnecting plumbing. Professional repair advice warns that improper repairs can cause ongoing leaks, cabinet rust and bigger failures.
What we do on a visit: pressure test, valve inspection and cleaning or replacement, tubing replacement with the right material, a leak test, and proper disposal of the damaged parts. After diagnosis, current prices are on our pricing page.
On cost, Consumer Reports survey data show icemaker and dispenser problems are common, and typical repairs run in the low-to-mid hundreds of dollars. Serious failures cost much more.
Pro Tip: Take a photo of the old tubing's fittings before you remove it. It makes buying the right replacement much faster.
Preventing future leaks: a maintenance checklist
A few minutes a year keeps the line from failing at 2 a.m.
- Keep water pressure in the manufacturer's recommended range, and fix household pressure problems early. Our quick checks for low water pressure at one faucet can help you tell whether the issue is house-wide.
- Replace the water filter on schedule so flow isn't restricted.
- Leave a service loop in the tubing and don't push the fridge flush against the wall. Kinks cause pressure swings and cracks.
- Inspect the tubing once a year and replace anything brittle or discolored.
- If you have hard water, mineral buildup can clog valves, so consider a professional check.
How to detect small or hidden leaks with common tools
Not every leak announces itself with a puddle. Small leaks hide behind the fridge or inside a wall cavity, and you can catch them with items from your kitchen.
The paper towel test. Dry every fitting and the full length of the tubing with a cloth. Wrap a dry paper towel around each connection, one at a time, and leave it there with the water on. Any damp spot on the towel marks a seep, even one too slow to form a drop.
The food coloring test. If you can't tell whether water is from the supply line or from condensation, add a few drops of food coloring to the ice maker's fill cup or reservoir area where accessible, or use it to trace where water travels in the freezer. Colored water that shows up on a paper towel under the fridge tells you the leak comes from inside the appliance, not the wall supply.
The dry floor test. Slide cardboard or a flat baking sheet under the fridge overnight. Check it in the morning for drips and note where they land.
Listen and look. A hissing or dripping sound when the ice maker isn't cycling suggests a valve that isn't closing. Check the back of the fridge and the wall box for rust, white mineral crust or a musty smell.
Write down what you find and where. If a paper towel stays wet after you tighten every fitting, stop and call us. Hidden leaks do their worst damage out of sight.

Replacing the water inlet valve or fill tube
Both parts are replaceable, and the steps are similar. Always shut off the water and unplug the fridge first.
Replacing the water inlet valve:
- Slide the fridge out and find the valve, usually on the back near the bottom.
- Take a photo of the wiring and tubing connections.
- Disconnect the water line and the electrical connector, then remove the mounting screws.
- Install the new valve with the matching part number from your fridge's model tag.
- Reconnect the tubing and wires, tighten fittings snugly without over-torquing, and turn the water on.
- Check every joint with a dry paper towel before pushing the fridge back.
Replacing the fill tube:
- Let any ice melt completely. Sub-Zero's guidance explains the tube only runs when the ice maker cycles, so freezing often traces back to pressure swings or valve trouble.
- Remove the ice maker cover and detach the old tube from the fill cup and the valve outlet.
- Fit the new tube, keeping it free of kinks and sagging low spots where water can pool and freeze.
- Reassemble and run a test cycle.
Replace the cause, not just the symptom. If a new fill tube freezes again, the valve or pressure is still the problem. We handle valve and tubing replacement, and if the job feels beyond you, so can we.
Common causes: installation errors and tubing wear
Many leaks trace back to how the line was first installed or to the material itself.
Installation errors we see most:
- Over-tightened or under-tightened compression nuts. Too loose drips. Too tight crushes the ferrule and drips later.
- Saddle valves. These self-piercing valves are leak-prone over time and can clog. A proper shutoff valve is the better choice.
- No service loop. Without slack, the tubing kinks or pulls on the fitting every time someone moves the fridge.
- Fridge pushed tight to the wall. It pinches the line against the wall box or valve.
- Wrong tubing for the job. Thin clear plastic lines are cheap, but they crack and kink. Soft copper or PEX holds up better.
Wear and age:
- Plastic tubing turns brittle and discolored with time.
- Copper can develop pinholes. Our write-up on pinhole leaks in copper pipes explains why this happens and when repair makes more sense than repiping.
- Hard water leaves mineral deposits that eat at fittings and clog valve screens.
- Constant vibration from the compressor slowly loosens connections.
If your fridge was installed by a previous owner or a quick delivery crew, the line may never have been done right. A plumber can check the whole run from the wall to the valve in one visit.
Signs of water damage beyond the icemaker area
A slow leak can soak flooring and cabinets long before you notice a puddle. Look past the fridge for these warning signs:
- Flooring: Warped, buckled or cupped boards, soft spots underfoot, lifting vinyl or tile, and dark staining along the seams.
- Cabinets: Swollen or crumbling cabinet bases, peeling laminate, or doors that suddenly stick.
- Walls: Bubbling paint, stains that grow, or drywall that feels damp or soft near the fridge wall.
- Smell: A musty, earthy odor that won't go away points to hidden moisture and mold.
- Rust: Rusty screws, brackets or the underside of the fridge itself.
- Pests and gnats: Damp wood and drywall attract them.
- Your water bill: An unexplained jump can mean a slow leak somewhere in the home. Our underground water leaks repair guide covers how to spot that kind of hidden loss.
Press a screwdriver tip gently into the cabinet floor or baseboard. If it sinks in, the wood is rotting. If you find damage, dry the area fast with fans and a dehumidifier, and call us before you cover anything up. For a structured leak and damp survey with written findings, this partner site on plumbing leak repairs shows what a documented inspection looks like. And if the fridge was off for a while, watch food safety: the USDA warns food is at risk when temperatures stay above 40 °F for more than two hours, and an appliance thermometer helps you track it.
Disposing of replaced parts the right way
Old valves, tubing and filters seem harmless, but how you dispose of them depends on where you live.
- Metal parts: Brass fittings, copper tubing and steel brackets are recyclable. Drop them at a local scrap or metal recycler.
- Plastic tubing and filters: These generally go in household trash, but check whether your water filter brand runs a take-back program.
- Electrical parts: The inlet valve contains a solenoid coil. Some areas treat small electrical components as e-waste, so check with your city or county waste service.
- Refrigerant or the appliance itself: Never vent refrigerant. If you are replacing the whole fridge, the retailer or a licensed hauler should handle removal.
- Leftover water and filter residue: Pour it down a drain, not onto the ground.
Rules vary by city and county, so call your local waste or recycling office if you are unsure. When we replace parts on a service call, you don't have to sort out the old components.
Author perspective: why the plumber's call can save you thousands
Water and electricity share a very small space behind your fridge. That is why I tell homeowners to treat every icemaker leak as more than a nuisance. An ignored drip can rot a cabinet base, lift flooring and feed mold, and by then you are paying for far more than a replacement line. Our team at USA Plumbing and Septic LLC is available to help, so you don't have to handle a leak alone. Shut it off, unplug it, photograph it, and call when you aren't sure. A quick diagnosis almost always costs less than the damage a guess can cause.
— JOHN
How we help with icemaker water line leaks
When the fix goes beyond a tightened nut, we are ready to step in and help. We take care of:
- Leak detection and repair
- Water line and inlet valve replacement
- Emergency response when water is already spreading
On a service call, we diagnose the source, and either complete the repair or make the line safe until it can be done. Call us or book through USA Plumbing and Septic LLC now and we will get a licensed plumber on the way.

FAQ
How do you fix a leaking ice maker?
Shut off the water, unplug the fridge, and find where the water appears. Tighten loose fittings, replace cracked tubing, or defrost a frozen fill tube. If the leak continues, the inlet valve likely needs replacing.
Is it worth fixing a refrigerator ice maker?
Often yes. Consumer Reports survey data show icemaker repairs typically cost in the low-to-mid hundreds of dollars. That is usually far less than replacing the fridge.
What causes the water line to freeze up in an icemaker?
Slow drips freeze inside the fill tube. Common triggers are low or fluctuating water pressure and debris that keeps the valve from closing fully, according to iFixit. Defrosting takes 4–6 hours.
How do you replace a refrigerator water valve?
Shut off the water, unplug the fridge, and disconnect the water line and wiring at the valve. Remove the mounting screws, install the matching new valve, and reconnect everything. Check each joint for leaks before pushing the fridge back.
Sources
- Lg
- Refrigerator Leaking Water - iFixit Troubleshooting
- Should You Repair or Replace Your Broken Refrigerator? - Consumer Reports
- Service Pointer - W11560805 - Rev B - Frozen Fill Tube and Fill Cup