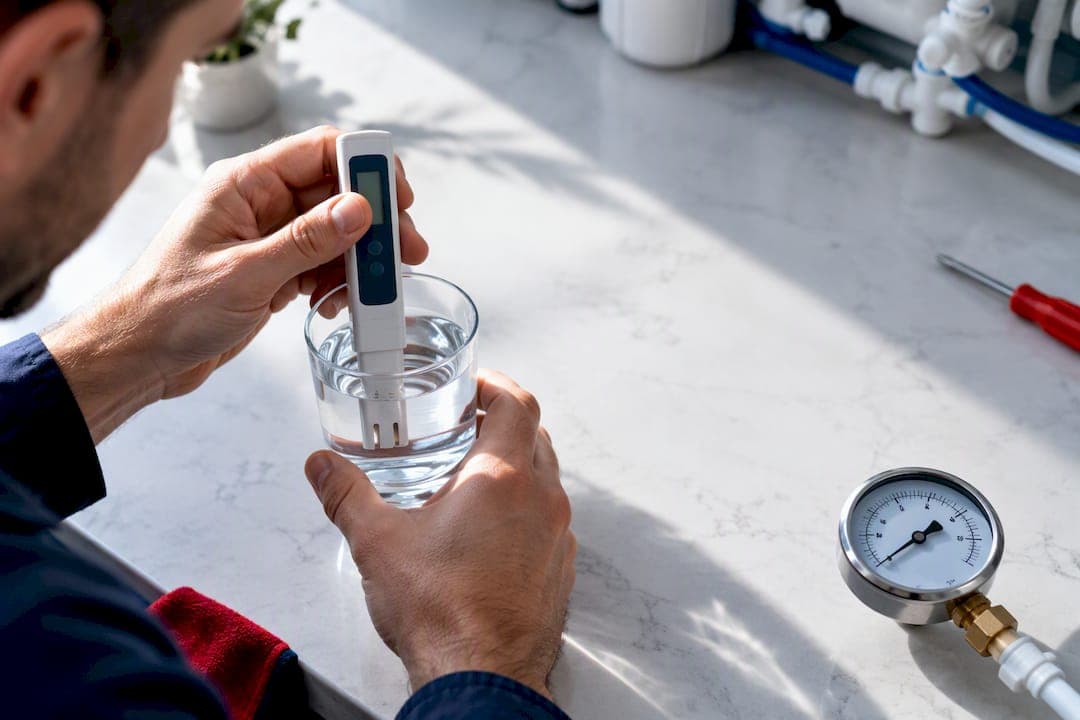
The minimal reverse osmosis maintenance routine is simple: a five-minute monthly check, sediment pre-filter swaps every three to six months, carbon and post-filter changes every six to twelve months, an annual sanitization, and membrane evaluation every two to five years. Three numbers help you assess system health: TDS rejection compared to baseline, pressure differential across the pre-filter, and tank pressure when empty. If rejection stays low after fresh filters, or you hear pump noise or see a leak, it's time to call a plumber.
TL;DR:
- Replacing the sediment pre-filter is necessary when the inlet-outlet pressure differential exceeds 10-15 psi, even if it's only every three to six months.
- Testing TDS levels after filter changes ensures the baseline remains accurate, and a rejection drop of more than 10-15% signals membrane aging.
- A tank pressure below five psi or rapid cycling indicates bladder failure, requiring prompt attention to prevent system damage.
- System sanitization involves approved solutions like citric acid or hydrogen peroxide annually, with sodium-based bleach strictly avoided around the membrane.
- Persistent low TDS rejection, noisy booster pumps, or leaks after reassembly should be addressed by a licensed plumber to avoid system damage.
Table of Contents
- A compact maintenance schedule you can follow month to month
- How to change RO filters yourself, step by step
- Sanitizing your system and knowing when a membrane needs cleaning
- Reading your system's numbers: TDS, pressure, and what they mean
- What you need on hand to do this right
- When it's time to call a licensed plumber
- What years of service calls teach you about RO upkeep
- Let USA Plumbing and Septic LLC handle the parts you'd rather not
- Standards and guides worth reading
- Sources
- FAQ
A compact maintenance schedule you can follow month to month
Reverse osmosis systems reward consistency more than intensity. A few minutes each month beats a frantic overhaul once a year, and it catches small problems before they become expensive ones.
Monthly, five minutes:
- Check under the sink and around the unit for drips or moisture.
- Run the RO faucet and note whether flow feels weaker than usual.
- Check tank pressure and inspect visible tubing for kinks or wear.
Quarterly to every six months:
- Replace the sediment pre-filter, or sooner if the inlet-to-outlet pressure differential exceeds 10 to 15 psi.
- Note the date and pressure reading in a simple log.
Every six to twelve months:
- Replace the carbon pre-filter and check the post-filter for wear.
- Test TDS right after the swap to confirm the new baseline.
Annually:
- Sanitize the entire system and inspect housings, O-rings, and fittings for cracks.
- Record TDS and pressure baselines so next year's readings mean something.
Every two to five years:
- Compare current TDS rejection to your baseline.
- Replace the membrane, or arrange professional cleaning, if rejection drops more than 10 to 15% or flow drops noticeably.
These intervals track what industry maintenance guides recommend for sediment, carbon, post-filter, and membrane service life, though your unit's manual may specify different numbers. Our plumber-vetted filtration checklist walks through manufacturer schedules in more detail.
How to change RO filters yourself, step by step
Changing filters is one of the more approachable DIY plumbing tasks, but skipping steps causes leaks and cross-threaded housings more often than any other mistake.
- Shut off the feed water valve and the tank valve. If you're unsure where your main shutoff is, our guide on finding your main water shutoff applies to the same isolation principle.
- Open the RO faucet to relieve pressure in the lines, then let the tank drain fully.
- Use a filter housing wrench, not pliers, to remove each housing without cracking the plastic.
- Inspect the O-rings. Replace worn ones with food-grade silicone O-rings and a light coat of silicone lubricant before reseating.
- Insert the new cartridge, aligning it straight so the housing threads without resistance.
- Reassemble by hand first, then snug with the wrench. Overtightening cracks housings; cross-threading causes slow leaks that show up days later.
- Slowly reopen the feed valve and watch every joint for drips.
- Let the tank refill, then run a TDS spot test and log the result next to the date and filter type.
Never let carbon dust or fines migrate downstream toward the membrane, and never use chlorine-based cleaners anywhere near the membrane stage.
Pro Tip: Keep a spare set of O-rings and a filter wrench in the cabinet under the sink so a mid-week leak doesn't turn into a weekend without filtered water.

Sanitizing your system and knowing when a membrane needs cleaning
Sanitizing an RO system once a year controls biofilm and keeps the tank and lines from harboring bacteria between filter changes.
- Isolate the system, drain the tank, and remove the membrane housing per the manufacturer's steps.
- Add an approved sanitizer, such as a citric acid or hydrogen peroxide solution, and let it dwell per the product instructions.
- Flush thoroughly with fresh water until no sanitizer taste or smell remains.
- Test TDS after the flush and record it alongside the sanitizer used and the date.
Chlorine bleach is common under kitchen sinks, but it's the wrong tool here. Chlorine exposure above roughly 0.1 ppm at the membrane inlet permanently damages polyamide membranes, so stick to citric acid, sodium bisulfite, or hydrogen peroxide formulations made for RO systems. If fouling looks like scale or biofilm and a home sanitization doesn't restore flow, a professional clean-in-place is the safer next step rather than repeated DIY attempts.
A well-documented service log, with dates and pre and post TDS readings, is one of the strongest safeguards against premature membrane failure and often protects warranty claims.
Reading your system's numbers: TDS, pressure, and what they mean
Objective numbers beat guesswork every time. Three readings tell you almost everything about system health.
- TDS rejection: calculate it by comparing feed water TDS to permeate TDS. A sustained rejection drop of 10 to 15% from baseline, or rejection below 90%, signals membrane aging.
- Pre-filter pressure differential: a gap of more than 10 to 15 psi between inlet and outlet means the filter is loading up and due for replacement.
- Tank empty pressure: a healthy tank reads 5 to 7 psi when empty. Rapid cycling or noticeably reduced usable volume points to bladder failure.
A single low reading can be noise. A trend across three or four checks is a signal, and it's the difference between reacting to a symptom and catching a problem early.
Log every reading. A number without history tells you almost nothing; a number compared to last quarter tells you exactly what to do next.
What you need on hand to do this right
A handful of inexpensive tools make the difference between a five-minute job and an afternoon of frustration.
- A digital TDS meter, dipped in the permeate stream for a quick rejection check.
- A filter housing wrench sized to your unit, plus an adjustable wrench for tank fittings.
- Spare O-rings and food-grade silicone lubricant for every housing seal.
- Replacement cartridges rated to NSF/ANSI 58, matched to your manufacturer's part numbers.
- Citric acid or hydrogen peroxide sanitizing solution made for RO systems.
Budget for pre-filters two to four times a year, carbon and post-filters once or twice a year, and a membrane every couple of years depending on your feed water.
When it's time to call a licensed plumber
Some jobs belong to a homeowner with a wrench and a log book. Others belong to a licensed plumber, especially anything involving pressurized vessels, electrical connections, or a pump that won't quit making noise.
- Persistent low TDS rejection after a fresh filter and membrane swap.
- A booster pump that's noisy, cycling erratically, or not building pressure.
- A cracked housing or vessel, or a leak that won't stop after reassembly.
- Any electrical component near the RO system that shows signs of wear.
Professional plumbers handle water softening and filtration repair and replacement, along with water line leak detection, water well equipment service, and emergency calls related to failed pressure tanks or pumps that have stopped responding. A professional visit typically documents pre and post TDS, pressure readings, and the parts replaced, which protects both warranty coverage and long-term performance.
A documented service visit turns a one-time fix into a baseline you can measure against for years.
What years of service calls teach you about RO upkeep
Three mistakes show up again and again: skipping pre-filter swaps until the membrane takes the abuse, reaching for household bleach because it's under the sink, and never writing anything down. Each one is avoidable, and each one shortens a membrane's working life.
The better habit is tracking pressure differential and TDS trends instead of relying on the calendar alone. A filter that still tests clean at month five doesn't need replacing just because a guide says four. Keep a simple log, and let the numbers tell you when to act.
— JOHN
Let USA Plumbing and Septic LLC handle the parts you'd rather not
Filter swaps and monthly checks are manageable for most homeowners, but membrane replacement, pump repair, and full system sanitization are easier left to a licensed plumber, especially when a system has gone years without service.

Professional plumbing services include water softening and filtration repair and replacement, leak detection, pump service, and emergency plumbing to keep an RO system and the rest of the household water supply running. Before you call, have a few details ready:
- Your system's brand and model, if you have it.
- The date of your last filter change or sanitization.
- Any recent TDS readings you've logged.
If your reverse osmosis system is due for service or acting up, reach out to USA Plumbing and Septic LLC to schedule a visit, or find your local page for Bullhead City service.
Standards and guides worth reading
- EPA WaterSense point-of-use RO specification: efficiency and reject water limits.
- NSF/ANSI 58: the core performance standard.
- WaterSense supporting statement: replacement interval requirements.
Sources
- Point-of-Use Reverse Osmosis Systems | US EPA
- WaterSense Draft Specification for Point-of-Use Reverse Osmosis Systems Supporting Statement (EPA)
- NSF/ANSI 58: Reverse Osmosis Drinking Water Treatment Systems | NSF
- Reverse Osmosis System Maintenance Guide: Service Intervals And Procedures | AMPAC USA
FAQ
Do reverse osmosis systems need regular maintenance?
Yes. Filters load up with sediment and carbon exhausts over months, and without replacement, a system's TDS rejection drops and the membrane wears out faster. A monthly check plus scheduled filter swaps keeps the system performing as designed.
Can I service my RO system myself?
Most filter changes and monthly checks are within reach for a homeowner with basic tools, including a filter housing wrench and a TDS meter. Membrane cleaning, pump repair, and diagnosing a persistent leak after reassembly are better handled by a licensed plumber.
Is reverse osmosis water hard on the kidneys?
There's no credible evidence that properly functioning RO water harms kidney function; it's simply water with most dissolved minerals removed. Concerns usually trace back to overall diet and mineral intake rather than the water itself.
What is the life expectancy of a reverse osmosis membrane?
A membrane typically lasts two to five years depending on feed water quality and how consistently pre-filters are changed, according to industry maintenance guidance. Tracking TDS rejection over time is a better indicator than relying on age alone.