
Pipe replacement planning sets the scope, schedule, budget, technique, permitting, and communications for a project so utilities and homeowners can replace failing pipes with minimal risk and disruption. The core elements every plan must address are: identifying the drivers and objectives, completing an inventory and condition assessment, ranking priorities, selecting a technique (rehabilitation vs. full replacement), securing permits and funding, managing procurement and construction, and closing out with testing and documentation. A residential service line repipe typically runs days to a few weeks from permit to restoration; a neighborhood main replacement can take months. The EPA and the LSLR Collaborative are the primary federal and industry authorities on lead service line replacement programs. For local inspection, repipe, and trenchless services in the Bullhead City, Fort Mohave, Mohave Valley, and Laughlin area, Usaplumbingseptic is a trusted resource.
Core planning elements at a glance:
- Drivers and project objectives (water quality, hydraulics, structural/leakage)
- Inventory and condition assessment (material, age, break history, GIS data)
- Priority ranking and segment selection
- Technique selection: open trench, CIPP lining, pipe bursting, HDD, or hand replacement
- Permitting, regulatory compliance, and funding identification
- Procurement and contractor selection
- Construction, testing, and closeout
- Stakeholder communications and restoration commitments
Table of Contents
- Why do pipes get replaced? The primary drivers and project goals
- How does pipe replacement planning work, phase by phase?
- What should you inventory and how do you assess pipe condition?
- Which replacement techniques should you consider?
- How do you decide which technique fits your project?
- What do pipe replacement projects typically cost and how long do they take?
- What permits, regulations, and funding options apply?
- How do you reduce disruption and communicate with homeowners?
- How do you select contractors and manage procurement?
- What do real pipe replacement projects look like?
- What do research and best practices say operators should do?
- A practical checklist for homeowners: what to expect and what to do
- Key Takeaways
- What contractors wish you knew before the estimate arrives
- Usaplumbingseptic: ready to help with your pipe replacement project
- Useful sources for further reading
- FAQ
Why do pipes get replaced? The primary drivers and project goals
Water-main renewal is typically performed for three primary reasons: water quality improvement, hydraulic improvement, and structural improvement (reducing leakage and repair frequency). Understanding which driver applies to your project shapes every downstream decision, from technique selection to budget size.
Water quality is the most urgent driver today, particularly for lead service lines. Federal rules under the Lead and Copper Rule Improvements (LCRI) now mandate that water systems replace lead and galvanized-requiring-replacement (GRR) service lines within 10 years. Discoloration, taste complaints, and corrosion byproduct violations all signal a quality-driven replacement need.
Hydraulic improvement becomes the driver when a main can no longer deliver adequate pressure or flow for fire protection or peak demand. Aging cast iron pipes lose carrying capacity as interior tuberculation builds up, measurable through the Hazen–Williams C factor. When C values drop far enough below design standards, cleaning and relining or full replacement restores flow without upsizing the pipe.
Structural and leakage reduction drives replacement when a segment breaks repeatedly or when leak-detection surveys reveal chronic losses. Recurrent breaks, corrosion pitting, and joint failures all point to a pipe that has passed its economic service life.
Other common drivers include code compliance (lead rules, cross-connection control), capacity upgrades tied to development, and renovation projects that expose existing lines for opportunistic replacement.
Treating a pipe segment's break history as a financial signal is one of the most underused planning tools available. A segment that breaks multiple times in a short period is often cheaper to replace than to keep repairing, once you factor in emergency labor, traffic control, and customer disruption costs.
Pro Tip: Every emergency repair is a free site investigation. When crews open a trench for an urgent fix, document the pipe condition with photos, note the material and wall thickness, and flag the segment in your GIS for accelerated replacement review. That data costs you nothing extra and can justify a capital project within months.
How does pipe replacement planning work, phase by phase?
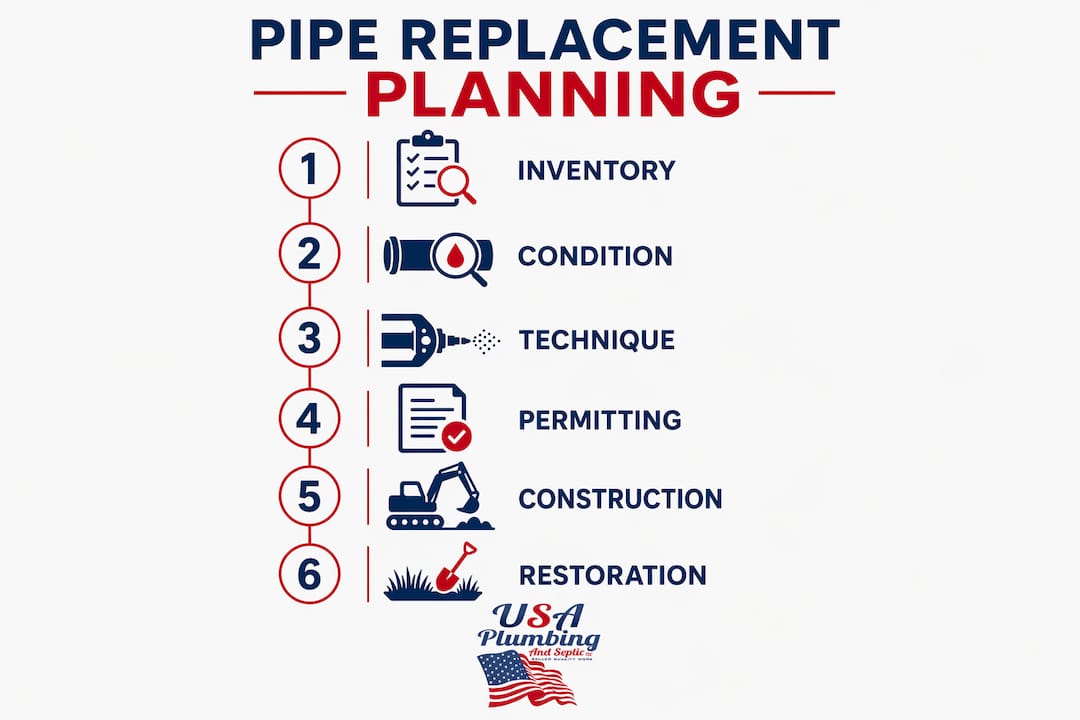
Understanding the pipe replacement process means seeing it as a sequence of decisions, each one narrowing your options and locking in cost. Front-end project decisions create the most value: early ranking of alternative technologies reduces cost and improves alignment with asset-management goals. Waiting until design to choose a technique is one of the most expensive mistakes a utility or homeowner can make.
The eight planning phases
- Feasibility and strategy — Define the problem, set objectives, and confirm the project is warranted. Identify regulatory triggers (e.g., LCRI lead line deadlines).
- Inventory and prioritization — Collect pipe data, assess condition, and rank segments by risk and need.
- Design and technology selection — Select the replacement or rehabilitation technique; develop engineering drawings and specifications.
- Permitting and funding — Secure local ROW permits, environmental clearances, and identify grant or loan funding.
- Procurement — Bid or negotiate contracts; finalize materials and equipment orders.
- Construction and installation — Execute the physical work: excavation or trenchless access, pipe installation, and service reconnections.
- Testing and closeout — Pressure test, flush, disinfect, and obtain regulatory sign-off.
- Operations handover — Update GIS and asset records; confirm restoration is complete and warranties are in place.
Who leads each phase?
| Phase | Homeowner | Utility Asset Manager | Consulting Engineer | Contractor | Permitting Authority |
|---|---|---|---|---|---|
| Feasibility | Initiates request | Approves scope | Advises | — | — |
| Inventory | Provides access | Leads data collection | Reviews | — | — |
| Design/Tech selection | Reviews options | Approves | Leads | Advises | — |
| Permitting/Funding | Signs applications | Manages grants | Prepares docs | — | Approves |
| Procurement | Approves bids | Manages contract | Reviews specs | Bids | — |
| Construction | Provides access | Oversees | Inspects | Leads | Inspects |
| Testing/Closeout | Confirms service | Accepts | Certifies | Executes | Signs off |
| Operations handover | Receives docs | Updates records | — | Delivers warranties | — |
Pro Tip: The front-end phases (feasibility through design) typically represent less than 10% of total project cost but determine 70–80% of the outcome. Cutting corners on inventory or technique selection to save planning dollars almost always costs more in change orders and rework.
What should you inventory and how do you assess pipe condition?
A useful inventory is not just a list of pipes. It is a dataset that lets you rank segments by risk, match them to techniques, and defend your prioritization to regulators and ratepayers. If you understand how residential plumbing systems work, you already know the key components; the inventory step is about capturing their condition systematically.
Essential inventory fields
- Location: GPS coordinates, street address, GIS layer reference
- Material: Cast iron, ductile iron, PVC, galvanized steel, copper, lead, HDPE
- Diameter and length: Nominal pipe size and segment length
- Installation date or estimated age: From as-built records or material inference
- Repair history: Number of breaks, dates, repair types, crew notes
- Break frequency: Breaks per mile per year (a key prioritization metric)
- Adjacent infrastructure: Proximity to roads, utilities, structures, and service connections
- Service connections: Number and material of lateral connections
Condition assessment methods
| Method | What it reveals | Best for |
|---|---|---|
| CCTV inspection | Internal defects, joint condition, root intrusion | Gravity sewers, large-diameter mains |
| Pressure/flow testing | Hydraulic capacity, leakage rate | Pressurized water mains |
| Leak-detection sensors | Active leak location, loss volume | Distribution mains, service lines |
| Excavation samples | Wall thickness, corrosion depth, material confirmation | Spot verification |
| Material testing (XRF) | Lead content confirmation | Service line material identification |
| Visual/records review | Age, prior repairs, complaint history | Initial screening |
Converting repair data into prioritization signals
- Calculate breaks per mile per year for each segment.
- Assign a hazard rating based on consequence of failure (proximity to schools, hospitals, major roads).
- Score segments on a combined risk matrix (likelihood × consequence).
- Flag segments with three or more breaks in the past five years for accelerated replacement review.
- Cross-reference with leak-detection alerts and emergency repair records to confirm field observations.
Which replacement techniques should you consider?
The right technique depends on your pipe's condition, the site, and how much disruption you can tolerate. Rehabilitation is often less expensive and less disruptive than open-trench replacement, but it is not always appropriate. Knowing common pipe materials and their failure modes helps you match the technique to the problem.
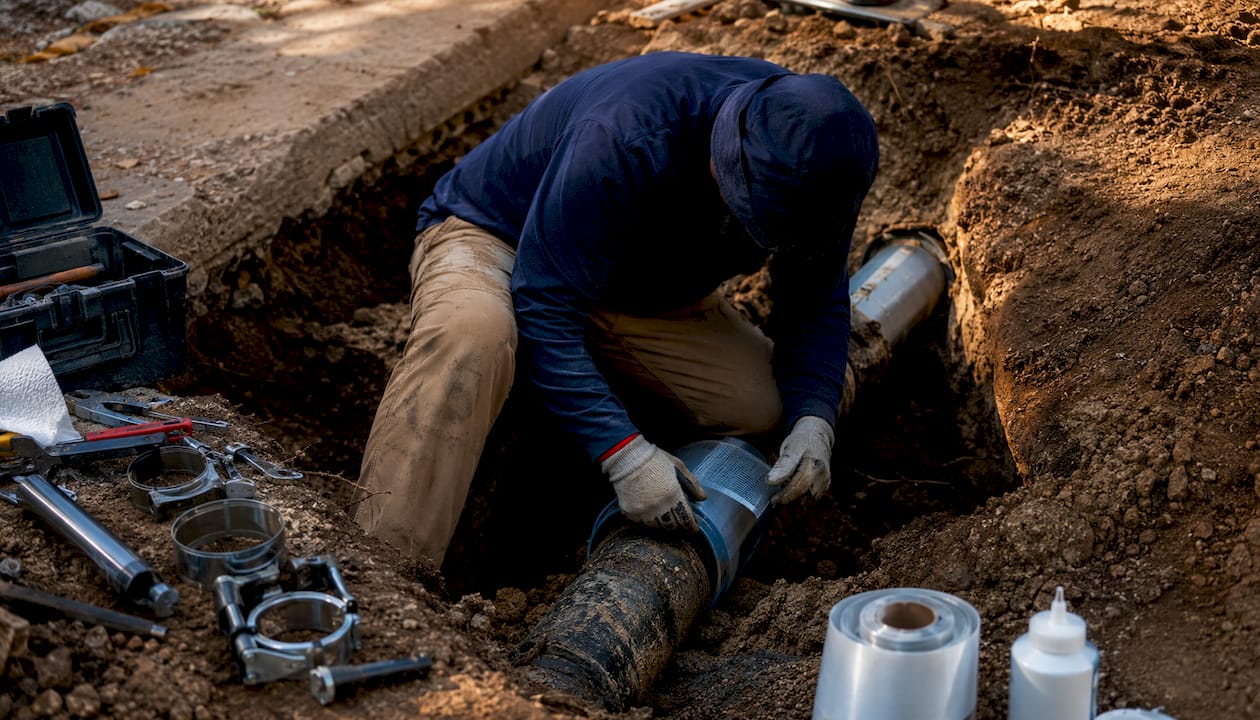
Main technique categories
Open trench replacement removes the existing pipe entirely and installs new pipe in the same or a new alignment. It works for any material and condition but causes the most surface disruption and the longest restoration time.
CIPP (cured-in-place pipe) lining inserts a resin-saturated liner into the existing pipe and cures it in place, creating a new pipe within the old one. No excavation is needed along the pipe run, only at access points. Best for structurally sound host pipes with localized defects.
Sliplining pulls a smaller-diameter pipe inside the existing one. Simpler than CIPP but reduces the internal diameter, which matters for hydraulic capacity calculations.
Pipe bursting fractures the existing pipe outward while simultaneously pulling in a new pipe of the same or larger diameter. Ideal for brittle materials like clay or cast iron in good alignment.
Horizontal directional drilling (HDD) bores a new path underground without disturbing the surface, then pulls the new pipe through. Best for crossings under roads, rivers, or structures where surface disruption is unacceptable.
Pipe ramming drives a steel casing through the soil using pneumatic impact. Used for short crossings under roads or railroads.
Hand replacement (service lines) is the standard approach for residential lead service line replacement: a small trench at the curb stop and the meter pit, with the line pulled or pushed through.
Technique comparison
| Technique | Property disruption | Typical duration | Suitability by material/condition | Equipment complexity | Permitting/access constraints |
|---|---|---|---|---|---|
| Open trench | High (full surface cut) | 3–7+ days per segment | Any material, any condition | Moderate (excavator, shoring) | ROW permit, traffic control |
| CIPP lining | Low (access pits only) | ~1 day per run | Structurally sound host pipe | Moderate (liner truck, curing unit) | Access pit permits |
| Pipe bursting | Low to moderate | 1–2 days | Brittle pipe (clay, CI), good alignment | Moderate (bursting rig) | Access pit permits |
| HDD | Low (entry/exit pits) | 1–3 days per bore | New route, crossings | High (drill rig, mud system) | Environmental review, ROW |
| Sliplining | Low (access pits) | 1–2 days | Larger-diameter host pipe | Low to moderate | Access pit permits |
| Hand replacement (service line) | Low to moderate | Hours to 1 day | Residential service lines | Low | Disconnect/reconnect approval |
Pro Tip: Trenchless methods require accurate condition data to confirm suitability. A CIPP liner installed in a pipe with active joint separation or significant deformation may not bond correctly. Always run a CCTV inspection before committing to a trenchless approach.
How do you decide which technique fits your project?
The technique decision is not a preference; it is a function of site conditions, pipe condition, budget, and disruption tolerance. A structured decision checklist keeps the selection defensible and documented.
Decision checklist
- Soil and groundwater: Unstable soils or high water tables complicate open trench; trenchless methods may be preferred.
- Traffic and ROW constraints: High-traffic corridors favor trenchless to minimize lane closures and traffic control costs.
- Depth and alignment: Deep pipes or curved alignments may limit pipe bursting or HDD feasibility.
- Pipe diameter and material: Larger diameters and certain materials (e.g., asbestos cement) require specific equipment and handling protocols.
- Pipe condition: Severely deteriorated or collapsed pipes may not be suitable for lining; open trench or bursting may be the only option.
- Adjacent utilities: Dense utility corridors limit HDD bore paths and open-trench excavation widths.
- Environmental restrictions: Proximity to wetlands, historic sites, or contaminated soils triggers additional review.
- Restoration tolerance: Mature landscaping, decorative driveways, or historic pavement may tip the decision toward trenchless even at higher cost.
- Budget and schedule: Trenchless methods often cost more per linear foot but save on restoration and traffic control.
Short scenario examples
-
Shallow residential service line with mature landscaping: A homeowner has a 60-year-old galvanized service line running under a mature lawn with established tree roots. Open trench would damage the root system and require full lawn restoration. Pipe bursting or hand replacement with a small access pit at each end is the preferred approach.
-
Cast iron main under a busy arterial road: A 6-inch cast iron main under a four-lane road with high break frequency. CIPP lining or pipe bursting avoids a full lane closure and weeks of traffic disruption. If the pipe has significant joint offsets, pipe bursting wins over lining.
-
New route crossing under a drainage channel: A utility needs to add capacity with a new main crossing under a concrete-lined channel. HDD is the only practical option; open trench would require channel dewatering and structural permits.
Pro Tip: Run a Multi-Criteria Decision Analysis (MCDA) for any project with more than one viable technique. Scoring each option on cost, disruption, schedule, risk, and long-term performance gives you a defensible selection record and speeds regulatory review.
What do pipe replacement projects typically cost and how long do they take?
Setting realistic expectations on timeline and cost is one of the most practical things planning for pipe replacement can do for you. Costs and durations vary widely by technique, site, and scope, but the ranges below reflect typical U.S. utility and residential projects.
Phase-level timeline ranges
| Phase | Residential service line | Neighborhood main replacement |
|---|---|---|
| Planning and design | 1–4 weeks | 2–6 months |
| Permitting | 1–2 weeks | 1–3 months |
| Procurement | 1–2 weeks | 1–3 months |
| Construction/installation | 1–5 days | 2–8 weeks |
| Testing and closeout | 1–3 days | 1–2 weeks |
CIPP lining can often be completed in one day; pipe bursting often takes one to two days, while open-trench methods commonly require several days to a week or more per segment. Planning and permitting phases typically take longer than the physical installation, especially for projects requiring environmental review or traffic management plans.
Illustrative cost ranges by project type
| Project type | Illustrative cost range | Primary cost drivers |
|---|---|---|
| Residential service line repipe (trenchless) | — | Access, pipe length, material, restoration |
| Residential service line repipe (open trench) | — | Excavation, pavement, landscaping restoration |
| Neighborhood main replacement (open trench, per LF) | $300+ per linear foot | Depth, traffic control, pavement type, disposal |
| CIPP relining (per LF) | — | Diameter, liner thickness, access points |
| HDD bore (per LF) | $80+ per linear foot | Bore length, soil type, diameter |
These are illustrative ranges for planning purposes. Actual bids depend on local labor rates, material costs, site-specific conditions, and contractor availability.
Primary cost drivers to watch:
- Site access and staging area availability
- Pavement type and restoration requirements (asphalt vs. concrete vs. decorative)
- Traffic control plan complexity
- Pipe material and disposal (lead pipe requires special handling)
- Contingency for unforeseen conditions (buried obstructions, utility conflicts)
Pro Tip: Budget a contingency on top of your base construction estimate for any pipe replacement project to account for typical unforeseen issues during underground work. Underground work almost always surfaces surprises. Projects that skip contingency budgeting routinely exceed their approved budgets, which delays closeout and erodes stakeholder trust.
What permits, regulations, and funding options apply?
Permitting and compliance steps are among the most common causes of project delays. Getting them right early keeps your schedule intact.
Typical permits and approvals
- Local ROW (right-of-way) permit: Required for any work in a public street or easement; issued by the city or county public works department.
- Traffic control plan approval: Required for any lane closure or detour; often reviewed by the same agency as the ROW permit.
- Water service disconnect/reconnect approval: Utility-issued authorization to interrupt service to customers.
- Building permit: Required in many jurisdictions for interior repipe work or service line replacement on private property.
- Environmental permits: Required near wetlands, floodplains, or contaminated sites; may involve state environmental agencies or the Army Corps of Engineers.
- State drinking water program notification: Required for work on public water system infrastructure.
Lead service line rules
The 2024 Lead and Copper Rule Improvements (LCRI) require all water systems with lead, GRR, or lead-status-unknown service lines to submit a replacement plan to their state. The EPA's planning guidance is the authoritative federal reference for compliance timelines, inventory requirements, and replacement program design. The LSLR Collaborative provides model outreach templates, contractor guidance, and case studies for utilities running community-scale programs.
The LCRI prohibits partial lead and GRR service line replacements unless they are conducted as part of an emergency repair or in coordination with planned infrastructure work such as water main replacements. Full replacement is the standard; partial replacement is the exception, not the default.
Funding and finance options
- Utility capital budgets: The primary funding source for planned main replacements; recovered through rates.
- Drinking Water State Revolving Fund (DWSRF): Low-interest loans and, in some cases, grants for eligible water system improvements including lead service line replacement.
- EPA Bipartisan Infrastructure Law funding: Dedicated funding streams for lead service line replacement programs administered through state drinking water programs.
- Homeowner cost-sharing programs: Some utilities offer subsidized or zero-interest loans for the homeowner-owned portion of a service line.
- Community Development Block Grants (CDBG): Available through HUD for eligible low-to-moderate income communities.
- Rate and tariff recovery: Utilities can recover replacement costs through approved rate increases or dedicated infrastructure surcharges.
How do you reduce disruption and communicate with homeowners?
Good communication before and during a pipe replacement project prevents complaints, speeds access, and protects the project schedule. A homeowner who knows what to expect rarely becomes a problem; one who is surprised almost always does.
Homeowner communications checklist
- Advance notice (minimum 48–72 hours): Door hangers, mailed letters, or utility bill inserts explaining the work, dates, and expected outage duration.
- Door-hanger content: Project description, contractor name and contact number, expected start and end dates, water outage schedule, and restoration timeline.
- Dedicated project contact: A phone number or email for homeowners to reach someone who can answer questions, not just a general utility line.
- Scheduled outage notification: Specific time windows for water shutoffs, not vague "sometime during the day" notices.
- Restoration commitments: Written statement of what will be restored (lawn, driveway, sidewalk, landscaping) and when.
- Post-restoration follow-up: A callback or door hanger confirming restoration is complete and providing a warranty contact.
Restoration expectations by technique
- Open trench: Expect a visible trench scar for 2–6 weeks while backfill settles; pavement patching typically follows within 1–4 weeks of pipe installation; lawn restoration (seeding or sodding) within 2–4 weeks.
- Trenchless (CIPP, pipe bursting): Surface disturbance limited to access pit areas (typically 4–8 square feet per pit); restoration of those areas within days of work completion.
- Service line hand replacement: Small excavations at curb stop and meter; surface restoration within 1–5 days depending on pavement type.
Tips for staging and traffic management:
- Schedule work in short segments to minimize the length of active disruption at any one time.
- Provide temporary water service (tanker or temporary connection) for outages exceeding four hours.
- Coordinate with school districts, hospitals, and businesses for outage timing to avoid peak-impact periods.
- Post clear signage at the work zone perimeter with the project contact number.
How do you select contractors and manage procurement?
Contractor selection is where many projects succeed or fail. The right contractor brings the right equipment, experience, and accountability. The wrong one brings change orders, delays, and disputes.
In-house crews vs. approved contractors vs. hybrid models
Utilities with large, ongoing replacement programs often maintain in-house crews for routine service line work and use approved contractors for main replacements or specialized trenchless work. An annual review of approved contractors, tracking equipment availability and recent performance, keeps the contractor pool competitive and current. A hybrid model, where in-house crews handle access and restoration while a specialist contractor handles the trenchless installation, can balance cost and expertise effectively.
Homeowners almost always rely on licensed plumbing contractors. The key is vetting them before signing anything.
Contractor question checklist for bids
- Are you licensed, bonded, and insured in this state and jurisdiction?
- Can you provide three references for similar projects completed in the past two years?
- What equipment will you bring to this job, and do you own it or subcontract the specialized work?
- What is your traffic control plan, and who manages it?
- What does your restoration warranty cover, and for how long?
- How do you handle lead pipe removal and disposal?
- What is your process for unexpected conditions (buried obstructions, utility conflicts)?
Procurement clauses that matter
- Performance milestones: Tie payment to verified completion of defined phases, not just calendar dates.
- Liquidated damages: Specify a daily dollar amount for delays beyond the agreed completion date.
- Change-order limits: Cap the contractor's authority to add scope without written approval; require a written change order for any cost increase above a defined threshold.
Red flags to watch for:
- No verifiable references or references who cannot be contacted
- Missing or expired insurance certificates
- Vague scope of work with no unit prices or line-item breakdown
- Pressure to sign before you have reviewed the full contract
- No written restoration warranty
Pro Tip: For commercial or utility-scale projects, consider how to select a commercial plumber service contract before issuing your RFP. The contract structure you choose (unit price, lump sum, or time-and-materials) has a bigger impact on your cost exposure than the bid price itself.
What do real pipe replacement projects look like?
Three concise examples show how planning choices translate into real-world outcomes.
Case 1: Residential service line relining (suburban neighborhood)
Scope: A homeowner with a 55-year-old galvanized service line running 60 feet under a mature lawn and concrete walkway. Water pressure had dropped noticeably and a camera inspection confirmed significant interior corrosion.
Technique selected: Pipe bursting, with access pits at the curb stop and the meter pit.
Timeline: Permit secured in four days; installation completed in one day; concrete walkway patched within three days.
What went well: No lawn damage beyond the two small access pits. The homeowner had photos of the prior camera inspection ready, which sped the contractor's estimate by a full day.
Lesson learned: Having your inspection data organized before the contractor arrives cuts estimate time and reduces the chance of scope surprises.
Case 2: Small neighborhood main replacement (open trench)
Scope: 800 linear feet of 6-inch cast iron main with a break frequency of four breaks per year. The utility prioritized the segment based on its risk score and proximity to a school.
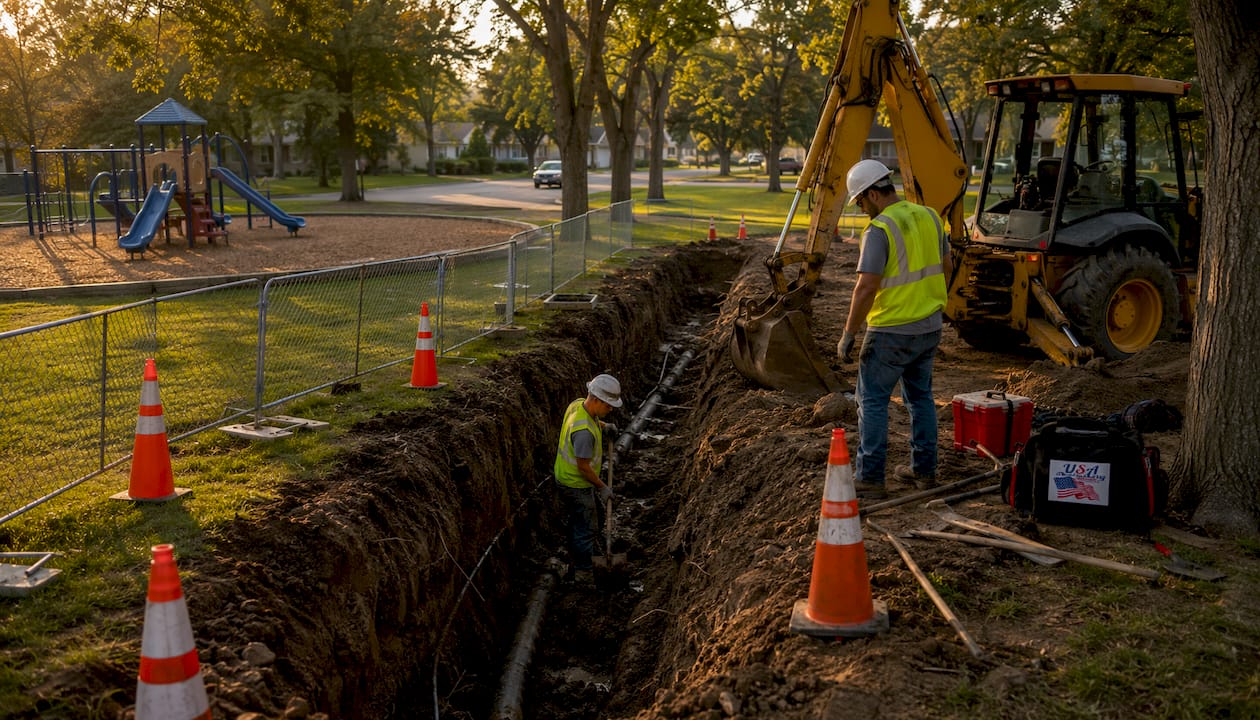
Technique selected: Open trench replacement with ductile iron pipe.
Timeline: Design and permitting took six weeks; construction ran 18 working days; restoration (asphalt patching) completed within two weeks of pipe installation.
What went well: Advance door-hanger notices sent 72 hours before each block's work began reduced resident complaints to near zero.
Lesson learned: Staging the work one block at a time, rather than opening the entire 800-foot run at once, kept traffic disruption manageable and allowed faster restoration.
Case 3: Lead service line program rollout (utility-scale)
Scope: A mid-size water utility identified 1,200 lead service lines through a system-wide inventory required under the LCRI. The utility developed a phased replacement program targeting 300 lines per year.
Technique selected: Hand replacement (curb-to-curb) for most lines; pipe bursting for lines under driveways or with difficult access.
Timeline: Program planning and state plan submission took four months; first-year replacements completed on schedule.
What went well: Partnering with the LSLR Collaborative for outreach templates and community engagement materials reduced the utility's communications workload significantly.
Lesson learned: Homeowner participation rates improved when the utility offered a same-day interior plumbing flush and filter installation alongside the service line replacement.
The utilities that move fastest on lead service line replacement are the ones that treat it as a community health program, not just a construction project. Outreach, trust-building, and homeowner support services matter as much as the pipe work itself.
What do research and best practices say operators should do?
Moving from a reactive repair program to a proactive replacement program is the single biggest operational shift a utility can make. Front-end planning that ranks alternative renewal approaches early reduces the need for costly scope changes during construction and improves alignment with long-term asset-management goals.
Implementation tips for operators:
- Use every emergency repair as a diagnostic moment. Crews who document pipe condition during a repair give planners the data they need to accelerate replacement decisions.
- Deploy low-cost leak-detection nodes on hydrants and integrate alerts with your GIS to triage segments for inspection without waiting for a visible break.
- Keep a commercial plumbing maintenance schedule that ties inspection cycles to asset age and break history, not just calendar intervals.
- Maintain a GIS-linked inventory updated after every repair, replacement, and inspection event.
- Conduct an annual review of your approved contractor list, confirming current insurance, equipment availability, and recent performance.
Metrics worth tracking:
- Breaks per mile per year (by segment and material)
- Hazen–Williams C factor, measured pre- and post-renewal to quantify hydraulic improvement
- Leak-detection alerts per month and response-to-inspection time
- Percent of lead service lines identified, replaced, and verified
- Contingency spend as a percent of construction budget (a proxy for front-end planning quality)
Pro Tip: Budget for specialized trenchless contractors as a line item in your capital program, not as an afterthought. Utilities that treat trenchless as an occasional option rather than a planned capability consistently pay more per job because they lack a standing contractor relationship and competitive bid history.
A practical checklist for homeowners: what to expect and what to do
If a utility or contractor has told you that your service line needs replacement, here is what to do before, during, and after the project.
Before the project starts
- Contact your local utility or municipality to confirm whether the replacement is utility-funded, cost-shared, or entirely your responsibility.
- Request a written estimate with a line-item scope of work, not just a total price.
- Confirm the contractor's license number with your state licensing board.
- Ask for a written restoration plan: what will be repaired, to what standard, and within what timeframe.
- Get the project schedule in writing, including the expected water outage window.
- Secure any permits required on the private-property side (your contractor should pull these, but confirm it).
- Check whether your homeowner's insurance or a utility assistance program covers any portion of the cost.
During the project
- Clear the work area of vehicles, outdoor furniture, and pets before the crew arrives.
- Keep a contact number for the project supervisor, not just the office.
- Take photos of your property before work begins so you have a baseline for restoration disputes.
- If you notice the water outage extending beyond the scheduled window, call the project contact immediately.
After the project
- Walk the restoration area with the contractor before signing any completion document.
- Confirm you have received the warranty in writing.
- Flush your interior plumbing for several minutes before drinking the water, and consider a filter if lead was present in your service line.
- Keep copies of all permits, inspection reports, and warranty documents.
Pro Tip: If your utility offers a cost-sharing or low-interest loan program for the homeowner-owned portion of a service line, apply before the contractor starts work. Most programs require pre-approval. Reviewing underground water leak repair guidance beforehand also helps you understand what the crew will find and why it matters.
Key Takeaways
Pipe replacement planning works best when front-end decisions on technique, scope, and budget are made before construction begins, because those early choices determine the majority of the project's cost and outcome.
| Point | Details |
|---|---|
| Front-end decisions matter most | Technique and scope choices made before design strongly influence the overall project cost and quality. |
| Match technique to disruption tolerance | Trenchless methods (CIPP, pipe bursting) cut surface damage but require accurate condition data to confirm suitability. |
| Use emergency repairs as data | Every break is a free condition assessment; document and flag segments for accelerated replacement review. |
| Budget a 15–20% contingency | Underground projects consistently surface surprises; contingency protects your schedule and stakeholder trust. |
| Usaplumbingseptic for local service | For inspection, repipe, and trenchless work in Bullhead City, Fort Mohave, Mohave Valley, and Laughlin, Usaplumbingseptic provides 24/7 professional service. |
What contractors wish you knew before the estimate arrives
Most homeowners and even some utility managers underestimate how much the quality of their preparation affects the accuracy of a contractor's estimate. When a crew arrives at a property without knowing the pipe material, the location of the curb stop, or the history of prior repairs, the estimate they produce is built on assumptions. Assumptions cost you money.
The most common mistake we see is homeowners calling for an estimate without having done a camera inspection first. A contractor who cannot see the pipe's interior condition cannot give you a firm price on trenchless work. They will either pad the estimate to cover unknowns or give you a low number that grows once they open the ground. Neither outcome serves you well.
What speeds an accurate bid: a recent CCTV inspection report, photos of the access points (curb stop, meter pit, cleanouts), a list of prior repairs with dates, and any utility correspondence about the line's material or condition. If you have those four things ready, a good contractor can give you a firm scope and price in a single site visit.
The second thing we wish clients knew is that restoration is not an afterthought. The pipe installation is often the fastest part of the job. Pavement cutting, backfill compaction, and surface restoration take time and cost real money. Ask for a restoration plan before you sign anything, not after the trench is open.
Finally, lead pipe removal is not the same as standard pipe replacement. It requires specific handling, disposal protocols, and in many cases regulatory notification. A contractor who does not mention this when quoting a lead service line job is either inexperienced or cutting corners.
Usaplumbingseptic: ready to help with your pipe replacement project
When you are ready to move from planning to action, Usaplumbingseptic is the local team to call. We serve Bullhead City, Fort Mohave, Mohave Valley, and Laughlin with 24/7 professional plumbing services, including CCTV pipe inspection, service-line repipe, trenchless options, and full restoration.

Before your on-site estimate, have these ready: the location of your curb stop and meter, any prior repair records or utility correspondence, and photos of your access points if you have them. Our team will assess your pipe condition, walk you through your technique options, and deliver a written estimate with a clear scope, timeline, and restoration commitment.
For sewer line solutions or a full service-line repipe, contact Usaplumbingseptic today. Call us or book online at usaplumbingseptic.com to schedule your inspection and get a reliable estimate from a team that knows the local conditions.
Useful sources for further reading
The following authoritative resources were used to build this guide. Each one serves a specific purpose depending on whether you need regulatory guidance, technical selection criteria, or funding information.
-
EPA: Planning and Conducting Lead Service Line Replacement — The primary federal reference for LCRI compliance, inventory requirements, and replacement program design. Start here if you are a utility manager building a lead service line program.
-
LSLR Collaborative: Understanding Replacement Techniques — Practical guidance on technique selection, outreach templates, and community engagement for lead service line programs. Highly useful for utilities and contractors running community-scale replacement efforts.
-
AWWA Manual M28: Rehabilitation of Water Mains, Third Edition — The industry standard reference for water main rehabilitation and replacement decisions, including decision trees for technique selection and hydraulic assessment methods.
-
MDPI: More Effective Front-End Decision-Making for Pipe Renewal Projects (2025) — Research paper on using Multi-Criteria Decision Analysis in the front-end planning phase to rank technologies and reduce downstream cost. Recommended for utility asset managers and consulting engineers.
-
WaterFM: Best Practices for Pipe Repair and Replacement Programs — Operational best-practice guidance on moving from reactive to proactive programs, including contractor management, leak detection, and using emergency repairs as diagnostics.
-
ASCE Library: Scheduling Renewal of Water Pipes — Academic research on optimal scheduling of pipe replacement considering adjacency of infrastructure works and economies of scale. Useful for utility planners managing multi-year capital programs.
Always consult your local permitting authority and state drinking water program for jurisdiction-specific requirements. Federal guidance sets the floor; local rules often add requirements on top of it.
FAQ
What are the disadvantages of trenchless pipe replacement?
Trenchless methods require an accurate condition assessment to confirm the host pipe is suitable; a structurally compromised or severely misaligned pipe may not be a candidate. They also typically cost more per linear foot than open-trench installation, and access pit locations must be carefully planned to avoid conflicts with utilities or structures.
How long does a pipe replacement project take?
A residential service line repipe using trenchless methods can often be completed in a few days including installation, with permitting adding one to two weeks. A neighborhood main replacement typically requires several weeks of construction, along with several months of planning, permitting, and procurement before construction begins.
Why does pipe sizing need to be calculated during planning?
Pipe sizing determines whether the replacement restores adequate pressure and flow or simply swaps one undersized pipe for another. Hydraulic calculations using the Hazen–Williams C factor confirm that the selected pipe diameter meets current and projected demand, including fire flow requirements, before design is finalized.
What is the repipe process from start to finish?
A structured repipe follows six steps: inspection and diagnosis (typically CCTV camera), method selection (trench vs. trenchless), permit acquisition, access point creation or excavation, pipe removal and new pipe installation, pressure testing and flushing, and surface restoration. The planning and permitting steps before physical work begins often take longer than the installation itself.