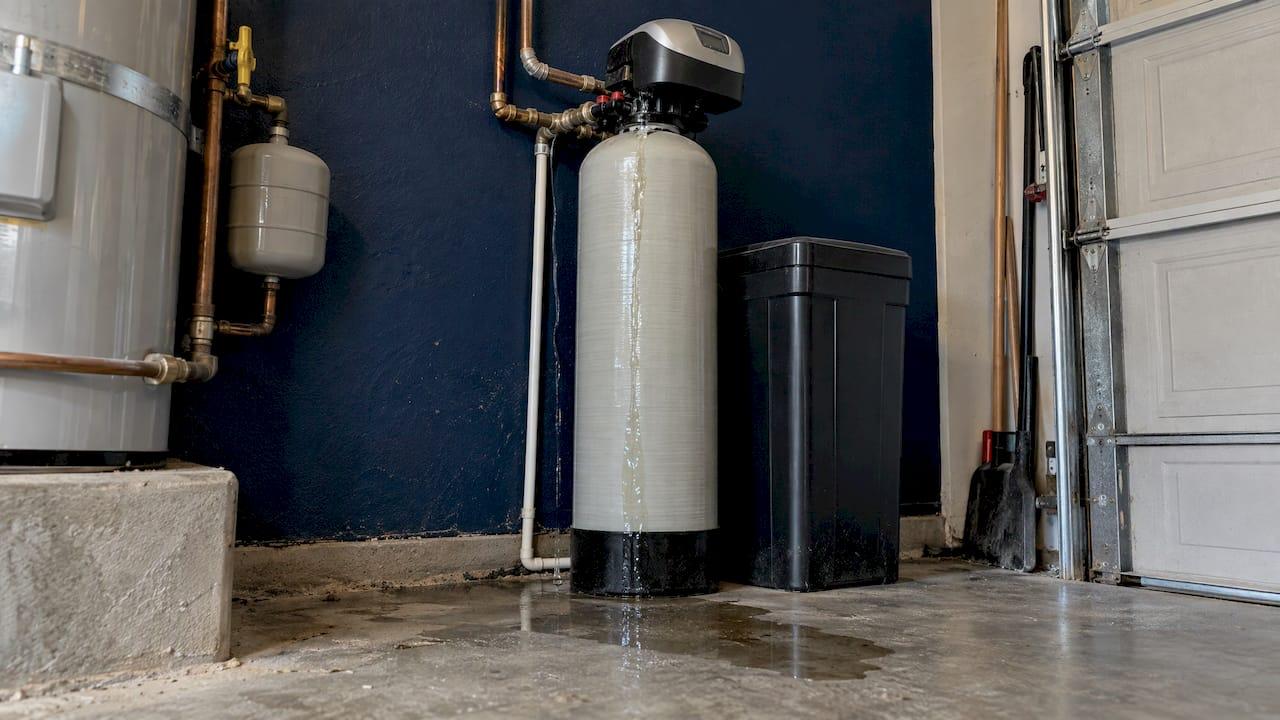
If your water softener is leaking, switch it to bypass, unplug the control head and trace the water uphill to where it starts. Water on the floor at the base of the unit rarely begins at the base. It usually comes from a valve, fitting, drain line or brine tank, and sometimes it is only condensation. Below we show you how to tell which, what to do in the first ten minutes, and when to call a licensed plumber.
We are USA Plumbing and Septic LLC. We work on water softening and filtration systems for homeowners and businesses in Bullhead City, Fort Mohave, Mohave Valley and Laughlin. Here is how we would walk you through a leaking softener.
TL;DR
- Dry the tank, lay paper towels under it and wait 30 to 60 minutes. A wet trail from one point is a leak. Even moisture across the whole tank is condensation.
- Stop the water first: set the bypass valve to bypass and unplug the control head so the unit cannot regenerate.
- A leak at the valve head usually means a worn O-ring. A cracked resin tank or brine tank usually means replacement.
- Resin beads in faucets, toilets or aerators point to an internal failure. Put the softener in bypass and call a plumber.
- Call us right away if the leak continues in bypass, water reaches finished flooring or the water heater, or you cannot isolate the unit.
Table of Contents
- First, Is It a Leak or Just Condensation?
- Why Water Softener Leaks Fool People
- Water Softener Leaking From the Bottom: What to Check
- Constant Drip or Only During Regeneration?
- What to Do Right Now to Limit Water Damage
- Resin Beads in Your Water or Plumbing
- Repair or Replace?
- Ways to Prevent Softener Leaks
- Our Perspective
- Need a Plumber for a Leaking Softener?
- FAQ
- Sources
First, Is It a Leak or Just Condensation?
The most common "leak" is not a leak. A softener tank holds cold water. In a humid room the tank surface can drop below the dew point, the air moisture condenses on it, and the water runs down and pools on the floor. The EPA's moisture control guidance explains the mechanism: condensation forms when a surface is colder than the dew point of the surrounding air, and it recommends keeping indoor relative humidity below 50 percent at 75°F to prevent it on indoor surfaces.
You do not need tools to check. Use this simple test:
- Wipe the whole tank and valve completely dry.
- Put dry paper towels or newspaper under and around the unit.
- Wait 30 to 60 minutes without using much water.
- Look at the pattern.
Condensation shows up as small droplets spread evenly across the cold tank surface, with no single starting point. A real leak starts at one spot, such as a fitting, a seam, a valve or a crack, and then tracks downward. Condensation also stays on the outside of the tank. It does not push water out from underneath.
There is a third case: water you expect to see. During regeneration the control valve flushes the resin tank and sends brine and rinse water down a dedicated drain line. Restore Advisor notes this typically runs 10 to 20 minutes every few days, and none of it is supposed to reach the floor. If water is pooling under or beside the unit, something has failed.
Why Water Softener Leaks Fool People
The puddle is not always under the problem. Water can escape at the bypass, run across the control valve, slide down the resin tank and drip to the floor several inches away from the real source. That is why a softener "leaking from the bottom" is often a valve or connection problem two feet higher.
So the rule is simple: wipe everything dry, then find the first wet spot. Start at the top and work down. Use a dry paper towel and touch it to each fitting, the valve head, the bypass, the drain connection and the brine line. The first towel that comes away wet tells you where to look.
Early warning signs are also easy to miss. Restore Advisor lists a swollen cabinet floor, a musty smell with no visible water, and moisture at the base of the tank as early indicators, often well before a puddle shows up on the floor. If your softener sits in a closet or cabinet, check the floor of the cabinet, not just the room.

Water Softener Leaking From the Bottom: What to Check
The softener has two tanks, and the leak means something different for each.
- The tall, narrow tank is the resin tank. Water pooling here is the serious one. Before you blame the tank, confirm the water is not running down from the valve above. If the shell itself is weeping at the base, the tank has failed and needs replacing.
- The wide tank is the brine tank. Water under it usually means one of two things: it overflowed, or it cracked. An overflow points to a stuck float, a clogged line or a regeneration problem. A crack is a replacement job.
Quick reference: where the water is and what it usually means
| Where you see water | Most likely cause | Typical fix |
|---|---|---|
| Evenly across the outside of the tank | Condensation | Reduce humidity, dry the area, insulate or ventilate |
| Around the top of the control valve | Worn valve O-ring or seal | Replace the seal or O-ring |
| Dripping from the top of the resin tank sides | Distributor O-rings | Replace the O-rings |
| At the bypass assembly | Worn bypass seals or loose connection | Reseat or replace seals |
| From the overflow hose | Brine tank water level too high | Find the cause of the overfill |
| From the drain hose all day | Valve or seal not closing, or cycle not finishing | Troubleshoot the valve and cycle |
| Under the wide brine tank | Overflow or cracked tank | Fix the overfill or replace the tank |
| Under the tall resin tank, from the shell | Failed tank | Replace the tank |
The valve and overflow pointers in this table come from manufacturer guidance. Morton's external leak troubleshooting page says a valve-head leak usually means an O-ring seal needs replacing, a bypass leak concerns the bypass assembly, and overflow-hose spills mean the water level is too high. Kenmore's guidance says the same about the main valve assembly.
Constant Drip or Only During Regeneration?
Timing is a strong clue. Note when the water appears.

A leak that drips around the clock is usually a pressure leak at a fitting or seal. Water is always pushing on it, so it never stops. This points to the valve head, the bypass, the plumbing connections or the tank itself.
A leak that appears only at certain times is likely happening during regeneration. In that case look at the drain line and the brine tank overflow. A loose clamp, a kinked or cracked drain hose, or a blocked line can all push water where it should not go.
A drain that runs continuously is a different situation. Service documentation for control valves ties continuous drain flow to the cycle not completing or to foreign material or internal leaks in the valve. That is a valve job, not a hose job.
Drain line setup matters
Drain connections can require an air gap. One control valve manual warns against inserting the drain line directly into a drain or sewer, because sewage can siphon back into the softener. If your drain hose is jammed down into a standpipe or tied directly into a drain, have a licensed plumber fix the connection properly. This is a safe-installation item, not a cosmetic one.
What to Do Right Now to Limit Water Damage
Do these in order. They take a few minutes and need no tools.
- Switch the bypass valve to bypass. It is on or near the control head on top of the resin tank, where the plumbing connects. Bypass sends water straight to the house and takes the softener out of the loop. The EPA's softener guide describes bypass as the way to divert water away from the softener.
- Unplug the control head. Otherwise the unit may try to regenerate while isolated.
- Watch the leak. If it stops, the problem is in the softener. If it keeps going in bypass, the leak is in the supply plumbing.
- Mop up and dry the area. Pull wet cardboard, rugs and stored items out of reach. A damp cabinet floor can swell and grow mold if left.
- Keep electrical connections dry. If water is near the plug, outlet or any wiring, do not touch the unit. Shut off power at the breaker first.
Do not wait on a "small" leak. Whirlpool's manual, as relayed by one troubleshooting site, says even a small softener leak can waste hundreds of gallons over a few days. That is money on your water bill and moisture in your walls.
Call a plumber right away if:
- The leak did not stop in bypass mode.
- You cannot isolate the unit at all.
- Water is reaching finished flooring, stored belongings or the water heater.
- Water is near electrical connections.
- The tank looks cracked or the control valve body is leaking.
If an actively leaking pipe or flooding is involved, our guide to fixing a burst pipe temporarily at home covers shutoff and stopgap steps while you wait for us.
Resin Beads in Your Water or Plumbing
This one is different from an ordinary leak, and it is more urgent. Resin beads are the small media inside the softener tank that do the ion exchange. If you find them in aerators, faucets, toilets or a washing machine, they are escaping from the softener. That points to an internal failure, such as a broken distributor tube or screen, or a compromised tank or distributor area. It is not a simple external connection leak.
They look like tiny, fish-egg-like beads, from very light tan to dark brown and somewhat translucent. The City of Fresno describes them as firm but very slippery when wet. Some homeowners also report yellow or orange sand-like specks collecting in aerators.
What to do if you find beads
- Put the softener in bypass to stop more media from entering your pipes.
- Save a sample in a small container so the cause can be confirmed.
- Use another source for drinking and cooking until the material is identified and your plumbing is cleared. Bottled water works.
- Remove aerators and showerheads and clear them.
- Flush affected lines. Fresno's guidance says to remove aerators and showerheads and flush hot and cold lines thoroughly, including the water heater and the washing machine and dishwasher lines. Flush the water heater before the lines.
- Call a plumber to inspect the softener and the fixtures.
Beads already downstream can keep turning up for a while, even after bypass stops new ones. That is normal. The bigger problem is that beads can lodge in fixtures, valves and appliance screens and cause low flow or stuck parts. A plumber can check each one. This Old House describes resin beads clogging faucets and toilets as a telltale sign that the distributor tube or resin tank has failed.
If your hot water seems weak after a bead incident, sediment may be part of it. See our walkthrough on cleaning water heater sediment buildup.
Repair or Replace?
Most leaks are fixable. The question is which part has failed.
Usually repairable:
- Worn O-rings and seals at the valve head or bypass
- Loose or cracked drain and overflow tubing
- Loose clamps and fittings
- Brine tank overflow from a stuck float or a blockage
- Distributor O-rings when water drips from the top of the resin tank
Usually points to replacement:
- A cracked or weeping resin tank shell
- A cracked brine tank
- A cracked control valve body
- Resin beads showing up in fixtures, which means the internal distributor or tank has failed
- A unit that keeps leaking in different places, which suggests the system is near the end of its service life
When the same unit leaks again after a repair, we look at the whole system rather than one part. A repair that costs a large share of a new unit's price on an older softener rarely makes sense. We will tell you plainly which makes more sense for your home or building.
The cause of repeat trouble is not always the softener. Hard water that is not being treated properly puts extra stress on fixtures and pipes. Our guide to hard water plumbing problems explains what to watch for. If you are replacing, our article on water softener sizing shows how capacity is worked out so the new unit fits your household.
Ways to Prevent Softener Leaks
A few habits cut the odds of a mess:
- Check the floor around the unit monthly. Look under the tank and in the cabinet, not just at the visible floor.
- Look at the drain and overflow lines when you add salt. Make sure they are clamped, unkinked and routed correctly. Manufacturer manuals call for secured drain and overflow tubing.
- Do not overfill the brine tank. A tank too full can overflow.
- Keep humidity down where the tank sits. That cuts down on sweating tanks.
- Watch for salt bridges and mushing. A softener that is not regenerating properly can cause other problems. Our guide to salt bridge fixes covers the first things to try.
- Know where your bypass valve is before you need it.
- Do not ignore a drip. Small leaks tend to get bigger.
Our Perspective
We see the same pattern on most softener calls. The homeowner sees a puddle at the bottom and assumes the tank is done. Nine times out of ten we start at the top, wipe everything dry and find the first wet spot. Often it is a seal, a clamp or a drain line, and the fix is quick.
The other pattern is waiting. A softener sits in a garage, closet or utility room where nobody looks. A slow drip becomes a swollen cabinet floor, and then a bigger plumbing job. We would rather you call when you first see water than after it reaches the flooring or the water heater.
Because we handle the whole plumbing system, not just the softener, we can tell whether the water is coming from the unit or from the supply line behind it. That matters. If the leak continues in bypass, the softener is not the problem, and you want a plumber who can fix the pipe too. Our licensed plumbers repair and replace water softening and filtration systems, and we are available 24/7 for emergencies across Bullhead City and the surrounding area.
If you find resin beads in your fixtures, do not try to live with it. Bypass the unit and call us. We will inspect the softener, check your fixtures and get your water running clean again.
JOHN
Need a Plumber for a Leaking Softener?
We repair and replace water softening and filtration systems for homes and businesses in Bullhead City, Fort Mohave, Mohave Valley and Laughlin. That covers leaking valves and fittings, drain and overflow problems, cracked tanks and resin bead trouble, along with the plumbing around them.
See our water softening and filtration service in Bullhead City, or call or book through our main site any hour if water is on the floor.

If your leak is an emergency, switch to bypass first, then call. We will take it from there.
FAQ
Why is my water softener leaking from the bottom?
The water you see at the bottom often started higher up, at the valve head, bypass or a fitting, and ran down the tank. Under the wide brine tank it is usually an overflow or a crack. Under the tall resin tank it can mean the shell has failed. Dry everything and find the first wet spot before deciding.
Can a water softener leak because of condensation?
Yes. Cold water in the tank can make the outside sweat in a humid room, and the drips pool on the floor. Wipe the tank dry and put paper towels under it for 30 to 60 minutes. Even moisture across the tank means condensation. A wet trail from one spot means a leak.
Is it normal for my softener to drain water?
Yes, during regeneration. The valve sends brine and rinse water down the drain line for a short time every few days. That water should stay in the drain line. If it reaches the floor, or the drain runs constantly, something needs repair.
What are the little beads in my faucets and toilets?
They are most likely resin from your softener. They mean media is escaping through an internal failure, often a broken distributor tube or screen. Put the softener in bypass, use bottled water for drinking and cooking, clear your aerators and have a plumber inspect the system.
Can I keep using a leaking water softener?
It is better not to. Switch it to bypass and unplug the control head. Your household still gets water, just unsoftened, while the leak is found and repaired. If the leak does not stop in bypass or water is near electrical connections, call a plumber right away.
Sources
- EPA Moisture Control Guidance for Building Design, Construction and Maintenance
- Water Damage From a Water Softener or Filtration Leak, Restore Advisor
- External Leak, Morton
- External Leak, Kenmore
- 5600SXT Softener System manual
- EPA Soften Water Without Wasting It
- Property Owners and Contractors, City of Fresno
- How to Repair a Water Softener, This Old House